We dream to travel full time as a family and explore places with our 2-year-old toddler, but as of the moment, as our world is experiencing a crisis, we are stuck at home. While we stay safe at home, we enjoy watching our favorite trips last year and reminisce the moments we shared in that particular place.
Here are our Topmost Favorite California Travels from last year and the reasons why you should visit these places too with your whole family! I assure you, once this pandemic is over and you are boost with excitement on where to go next, don’t miss to visit these spots!
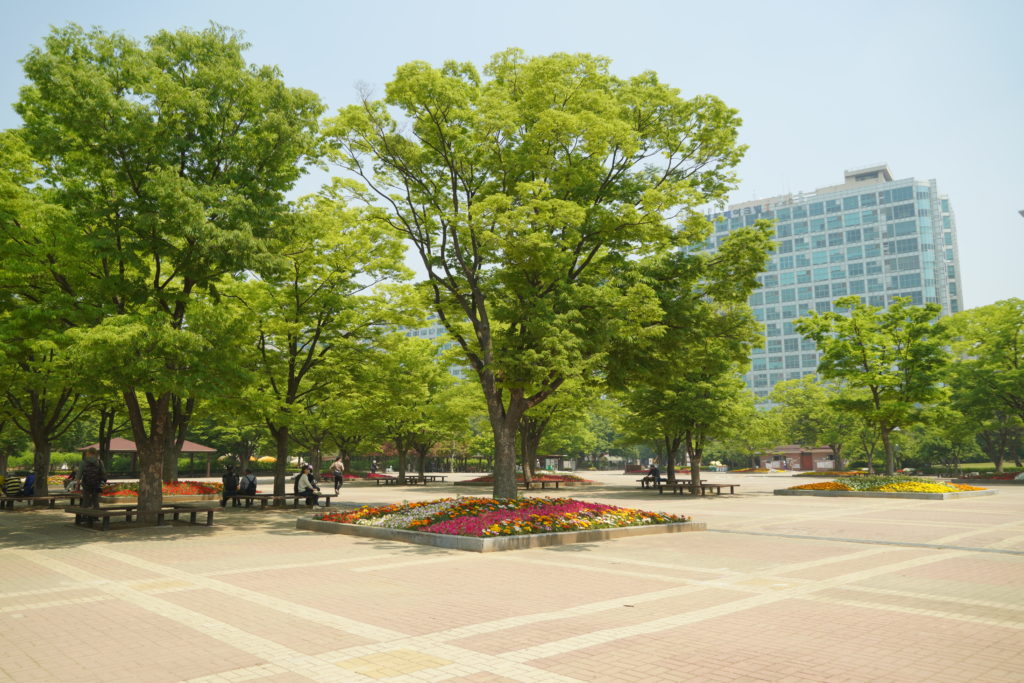
1. California State Capitol Museum
Located in the capital city of California, the State Capitol Museum is the number one tourist attraction in Sacramento. With free admission, it’s truly a perfect destination for the family to explore.
This is one of our favorite spots in Sacramento since we took our baby here for the first time when she was only 1 year old and it was her first experience to meet new friends with kids who were enjoying their school tour.
2. Burney Falls and Lassen Volcanic National Park
Who would not love to see a gigantic waterfall and hike up the snowy mountain close to a volcano? It sure is the main attraction in Redding, California. You will not only enjoy the waterfall and the hiking but also the beautiful scenery from crystal clear and colorful lakes!
These 2 places in California gave us the big “OH WOW! experience”, it was an incredibly beautiful wonderland of nature! Indeed, a treasure to explore in this city.
3. Squaw Valley & Alpine Meadows, Lake Tahoe
Welcome to the SKI CAPITAL of California: Squaw Valley and Alpine Meadows! Your next holiday destination for a fun family adventure! Although we don’t know how to snow ski or snowboard, we have the sleds that gave us the best time in the snow. It was surely a fun trip for the whole family, especially for our little one.
Very memorable and lovely experience! First snow sledding and first time to see people snow skiing and snowboarding, being an Asian coming from a tropical country I was so amazed!
4. Año Nuevo State Park: Elephant Seals
It was just last year when we first visit this place and during that time we didn’t get the chance to see the giant elephant seals on the shore. So we decided to visit again early this year of 2020.
These are the giants we’ve been waiting to see in this place. Elephant Seals were finally back after their feeding months. Even they were as enormous as how they are, these giants are harmless since you can see them just lying down in the shore sleeping or battling at their own kind. They don’t care about people but it’s a good reminder for all of us to respect their privacy in their natural habitat.
5. Napa Winery & Night Bloom Festival
We came for the wine and for our toddler to see a real-life castle! Castello di Amorosa is a family-friendly winery where kids can enjoy the animals that they have outside the castle and also enjoy their best grape juice drink.
While the Lighted Art Festival is an annual event in Napa every month of January and part of this festival is the Night Bloom where they showcase a display of majestic hot air balloons tethered in the beat of the music. It’s a free event that started last January 11.
We hope you can visit all these places too soon after the pandemic and when it’s already safe to travel. You can watch more of our travel adventures in our Vlog at Boss Traveler. Kindly follow us too by subscribing to our channel if you enjoy traveling like us.
FORM I-751: PETITION TO REMOVE CONDITIONS ON RESIDENCY
After being a lawful permanent resident for 2 years and 90 days before your 2 yr. Green card expires, K1 immigrants should apply for removal of condition on permanent residency or removal of conditional status in USCIS.
“You must file a petition to remove conditions on permanent resident status, or risk losing your lawful status.”
FILING FEE: $680
Form Fee: $595 + Biometric Fee: $85 = TOTAL of $680
Now how do you know if you are eligible for filing this application?
ELIGIBILITY:
Permanent resident for 2 yrs. Married to the same petitioner
May include kids or derivatives who are filing with you
Child/children who have the same status as you as a conditional resident based on parent
Widow or widower who came in good faith of marriage
Married in good faith before but was divorced or annulled
Married in good faith before but experienced abuse and or extreme hardship with U.S citizen spouse
Please be reminded of the following pointers when you are applying this Form I-751 Removal of Condition on Permanent Residency.
REMINDERS:
File application exact day within 90 day period before your green card expires.
File NOT too soon nor late. If you submit your application too early, USCIS will return your documents and if you file it late, you have to provide a good valid explanation of its cause before USCIS can accept it.
Sign all the required forms.
No signature will result in an automatic rejection of your petition application.
Make sure you are filling up the updated version of the form.
Signed with a correct total amount of $680 in a single check.
Arrange documents in order with the check or money order in the front.
Include an Index/Cover Letter, Form G-1145-E (Request for electronic notification: optional), Form G-28 (Attorney/Accredited Rep), Form I-751 (which is the form you are filing) and lastly are the copies of the supporting documents or evidence.
If you have extra attachments or pages in your application forms,
Make sure to write your NAME, A-NUMBER, and the PAGE NUMBERS.
After knowing that you are eligible in filing this petition, you can file a Petition on Removal of Condition in 2 ways or even file a waiver depending on your case.
WAYS OF FILING THE PETITION:
JOINT PETITION – If still married to the same petitioner
INDIVIDUAL – If due to Death of Petitioning Spouse and or due to Terminated Marriage
WAIVER OF JOINT FILING REQUIREMENTS – If due to abuse or extreme cruelty from U.S citizen spouse.
With all this information in mind, you can start your application by filling up the application form which is downloadable from the official website of USCIS.
FILLING UP THE APPLICATION FORM I-751:
Fill up and complete the form I-751 from USCIS website which is about 11 pages long and read thoroughly the instructions given for this form.
Submit all supporting documents and evidence (depending on your case).
SUPPORTING DOCUMENTS IF FILING AS JOINT PETITION
Which was what I prepared for mine when I filed my ROC application last year, October 2019.
Copy of your Green Card or Permanent Resident Card (front and back)
Copy of children’s green card (only those included in your petition)
Evidence of Relationship:
> Copy of marriage certificate
> Children’s birth certificate (child resulting from the relationship)
> Photos together from your marriage until present date (Submit copies of as many documents as you can to prove the marriage was entered in good faith)
Medical insurances
Joint ownership: financial liabilities and financial records
Household bills
Home and Car insurances
Affidavit of Support
Tax returns
Joint bank accounts
Copy of Passport ( Biographic page & page with stamps)
Explanation letter why you’re filing late (If applicable)
If you’re a child and filing separately from the parent. (If applicable)
Dispositions on criminal charges or arrests (If applicable)
SUPPORTING DOCUMENTS IF FILING AS INDIVIDUAL
Just like what I’ve mentioned earlier, this petition is case to case basis so if you are filing ROC or Removal of Condition due to Death of Petitioning Spouse and or due to Terminated Marriage you will file as Individual.
The required documentation is just the same as above, just with a few additional documents such as:
Divorce or annulment decree
Evidence in any circumstance showing end of relationship
For those who have experienced abuse or extreme cruelty from their U.S citizen spouse, you can file a Waiver of Joint Filing Requirements.
SUPPORTING DOCUMENTS FOR FILING A WAIVER
The required documentation is just the same as above, just with a few additional documents such as:
Evidence of abuse
Divorce or Annulment decree terminated by grounds of physical abuse or cruelty
Evidence of extreme hardship
After you prepared all the supporting documents or the requirements needed on your case and you have signed and completed the form of I-751, include the correct filing fee (single check) and you may submit your packet to USCIS. Check the link below for the address of USCIS.
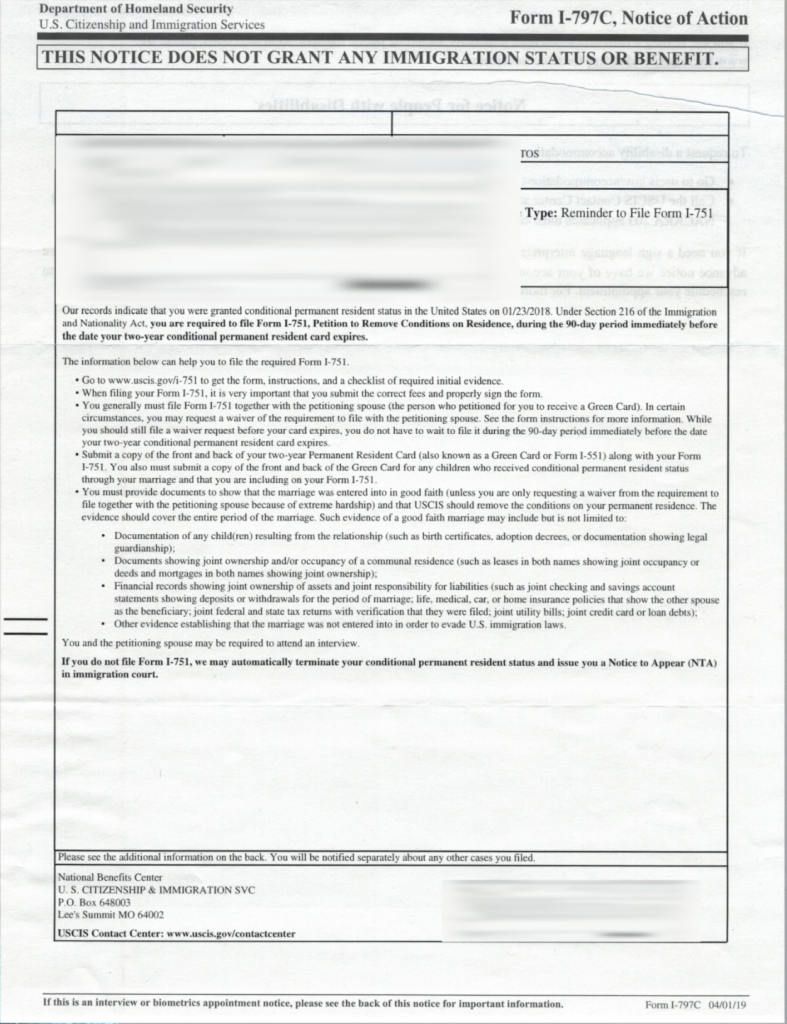
September 25, 2019: Receipt of USCIS Reminder Notice
About four months before my 2-year green card expires, I received a notice from USCIS reminding me to file for Petition on Removal of Condition of my permanent residency.
The notice stated the date I was granted a conditional permanent residency and the day of its expiry.
Also, the list of supporting documentation needed in the application form I-751.
And at the very end of the letter, it stated that failure to file Form I-751 will result in automatic termination of my conditional permanent resident status and I might also receive a Notice to Appear in immigration court.
OCTOBER 20,2019: Filing of Form I-751 Removal of Condition on Permanent Residency
We filed our petition just a couple of days before the 90 days expiry of my 2 yr. Green card.
But USCIS rejected our application since they received it earlier than the prior 90-day period preceding the expiration date of my green card.
NOVEMBER 6,2019: Receipt of Rejection Notice
ROC Rejection Notice
NOVEMBER 7,2019: Re-filing of Form I-751
This time I was so sure that it was within the 90 days prior expiration of my 2 yr. green card. I just had to print again the forms since when USCIS returned my previous application, each document has its stamp and was dated.
It is essential to have a copy of every application that you send to USCIS so that whenever some case like this happens, it’s easier for you to just make a copy of it again.
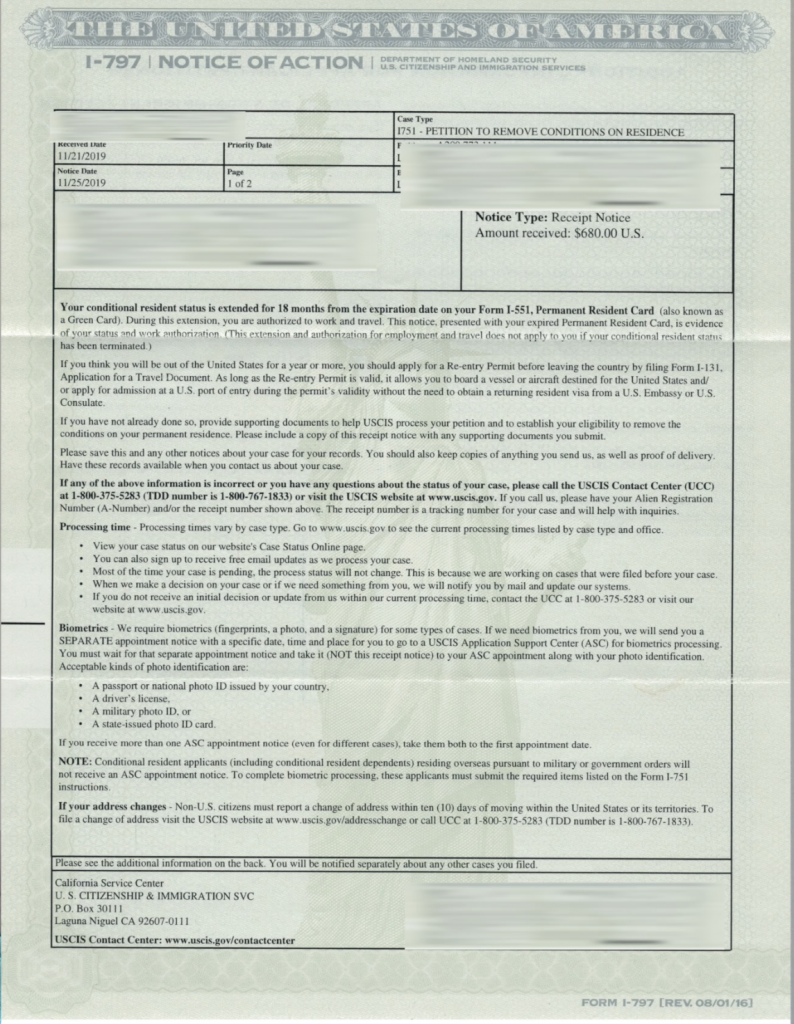
NOVEMBER 21,2019: Receipt of I-751 Extension Notice
ROC Extension Notice
The notice stated that my conditional resident status is extended for 18 months from the expiration date of my green card.
And that it is an evidence or proof of my status and work authorization. So I’m still authorized to travel or work.
Also, it stated there that they might request another Biometrics and if so, we might receive an ASC notice requesting for a biometric scheduled appointment.
In about a few more months, after the current situation of COVID-19, I might receive another ASC Biometric Notice. At this time, I haven’t received any RFE (Request for Further Evidence) from my application of ROC.
I just kept on tracking my status on the USCIS website while waiting for the next step.
In some cases, USCIS doesn’t ask any more for another biometric or interview during ROC approval, applicants could receive a 10-year green card as long as their petition has been approved.
I hope this post helps you in your application of ROC or Removal of Condition on your Permanent Residency. Please read all of my other posts about the fiance visa application and timeline on my previous posts or go on the links below.
We may have seen a lot of travel posts of friends with photos tagging their girl/boyfriends or their whole family. Some prefer traveling alone. It is unusual to see siblings hanging out and posting photos with captions #siblings goals. I know there is an endless list of benefits of traveling with siblings, but I would just like to cite some in this article.
My elder sister, younger brother and I decided to explore Japan, our first adventure outside the Philippines.
ONLY ONE VISA APPLICATION
This was the first thing that granted us the advantage of traveling with sibs. We had our visa application through the Reli Tours branch in SM North EDSA.
Just a reminder, you can only apply for a Japan VISA via an accredited travel agency.
Since we have the same last name (obviously), we decided to have one application and the Japan embassy had no worry approving our visas, given that we submitted all the required documents.
The agency told us that even only one of us can process the application. There was no need for all of us to show personally. And I felt confident that our VISA will be approved 100% because there was no other assumption the embassy could have why we are flying to Japan other than tourism, right?
I mean, the embassy just needs assurance that the applicants will be going back to the country and what could three siblings who obviously can’t stand the winter be doing in Japan?
OUR JAPAN ADVENTURE!
Castle in Japan
SHARE EVERYTHING, SAVE MORE
We arrived in Japan and took a rest in a single-room apartment in Lahaina Yuhigaoka Condominium, which we booked before our trip via AGODA.
If you are looking for a cozy yet inexpensive hotel and having no trouble in taking a 15min-walk from one of the nearest railway stations (Namba), then this hotel is for you.
We had no problem sharing in one room because we are comfortable enough with each other. This includes savings in our advantages of traveling with siblings. Not availing another room saved us a few yens that could be traded for some delicious ramens (see it rhymes?).
Eating Ramen in Japan
Those ramens could also be shared by us, but it didn’t happen just so you know. We all love ramen and you may call us whatever you want but we are not sharing, dear. Also, we could share our other belongings like clothes, toiletries to name a few.
SAME ENERGY AND SIMILAR WANTS
From the hotel, we also just walked our way to Shitenno-Ji Temple. I believe moving by foot was the most underrated part of our tour in Japan.
Those long walks helped us appreciate more how clean the Japanese streets are, how cool the architectural designs of their houses are, how refined the residents are, and how rich their culture is.
All these tiny details, above all, were the reasons why I always have the urge to go back to Japan. I even saw a Shiba-Inu, a rare dog of Japanese origin just by strolling.
Shiba-Inu Dog in Japan
Temples and other spots could be very crowded during peak hours but because we were minutes away from the hotel, we went there as soon as the sun rose.
We had the chance to capture memories by taking pictures without you know, the photobombers.
We also had the privilege to solo the hidden Japanese garden which I consider one of the highlights of our stay in Japan. We had no problem setting our own pace because we had no other acquaintance to consider.
Again, I want to emphasize that I was with my siblings only and not with our parents. We spent a day at the Universal Studios in Osaka.
Given my parents’ age brackets (no offense meant Ma and Pa), we all can assume that no parent will enjoy the whole day walking and queuing that could last for over an hour just for a ride.
I think walking is already a part of the Japanese people. Maybe that explains why they have longer life spans.
DISCOVERING NEW THINGS
Japan Universal Studios
Traveling with siblings could also give you new revelations with your “since birth” buddies.
Only that time at the theme park I found out that it was my brother’s first extreme ride. He hates heights. And in my sister’s case, I just discovered that she was freaking afraid of heights and the dark.
We all burst into laughter when we rode a monstrous roller coaster because my sister was yelling the F-word nonstop. She even passed out a split second on-air upon reaching the summit of that one hell of a ride. That was so hilarious.
EASY TALKS ABOUT MONEY
One more important point is you can straightforwardly talk about money. You don’t have to be conscious of dividing the bills in front of them which is sometimes difficult to do with your friends.
Siblings in Japan
You could also borrow money from them easily. And if you are the lender, you don’t have to worry that they will forget since you will keep annoying and reminding them even after the trip.
SIBLINGS WILL NEVER LEAVE YOU
Speaking of swearing, have you cursed a specific place because you went there with your previous lover? Worry no more; traveling with siblings doesn’t apply here.
You can go back to any place you’ve been without feeling bittersweet or gloomy, right? As they say, you can choose your partners, but you’re left with no choice when it comes to your sibs (sarcasm inserted).
Your siblings will never leave you alone even in the most embarrassing instances. Just like this one time when we visited the Osaka Castle at night to experience the so-called Lumina Nights.
Sakuya Lumina in Japan
During our stay in Japan, the weather was very unpredictable. The sun could be filled with life during the day and then rain poured at night.
So your conclusion was right, the next thing we know was we were already running with our lives to find a shade that night.
Luckily we spotted a vending machine that offered raincoats. It was our chance to experience wearing transparent raincoats and feel like we are some characters in an Anime show.
But we couldn’t make the machine work! We had no choice but to call out for help. It’s embarrassing. But thanks to that lady resident who came for us.
Man, she couldn’t hardly understand English. We just explained it with hand signals. If there was a contest in charades, I could be a champion after our trip to Japan.
But the Japanese people were very helpful despite the language barrier. More of them came for us and helped us try to make the machine work but we had no luck.
Instead, the locals helped us to create a makeshift coat made with plastic bags. Our dreams of being Anime characters were shattered and we became Oscars of Sesame Street.
THE CON
The only thing that is bothering when traveling with siblings is the argument. The fact that siblings are too comfortable with each other, they tend to lose patience easily.
That moment when any of you start complaining? Boom! Domino Effect. The vibe will start spreading with the whole group.
Anyways, those moments are now laughing stocks when we are reminiscing our trip. Just like when we first arrived at one of the train stations, we were like first graders solving a calculus problem.
Japan Train Ride
The railway system of Japan is so advanced yet complicated. We all installed JapanTravel, an application downloadable for free in the App Store that would help us identify the best route for a specific destination.
And guess what? Sometimes, the app gave us different recommendations. Imagine the chaos it caused us, given that we were time-constraint and starving.
Of course, short temper and hunger are partners in crime. We learned the system quite fast because of those arguments at least.
We experienced a lot of challenges. We couldn’t control the turn of events but the important thing is we learn from those experiences.
With this kind of trip, siblings’ bond becomes stronger and that, I think is the most significant advantage of traveling with our “original barkada”.
It gives us better memories and a tougher relationship. We are looking forward to our next adventure in South Korea and I’m very much excited to share with you our next #siblingsgoal.
After you got married to your petitioner or fiance within the 90 days period, it is a must to apply for adjustment of status and process your papers for your permanent residency. This is the process called “Green Card Application” where after you have submitted all the requirements and supporting documents and gets approved, you will receive your 2-year residency card (green card) or possibly a 10-year residency card if you file after 2 years of marriage.
You can also apply for Employment Authorization (EAD) to obtain a work permit here in U.S and Advance Parole or Travel document (AP) if you want to travel outside the U.S while still processing with your adjustment of status. You can file all these 3 applications together with single filing fee. But in my case, I only applied for two and those were the AOS and EAD.
One week after our marriage in the county, March 2017, we received our Marriage Certificate. We started our application for adjustment of status after we completed each and every single requirement of the Form I-485 Adjustment of Status.
Filling up Form I-485 Application to Register Permanent Residence or Adjust Status
This has a total of 18 pages where you need to complete all necessary documentation including important details needed in the application form. Make sure that the forms you are filing are the updated ones and don’t forget to sign all your application forms before filing them with the correct filing fee.
REQUIREMENTS
(EVIDENCE & SUPPORTING DOCUMENTATION )
1. 2 pcs. 2×2 recent photographs
2. Photocopy of Government Issued I.d with your photo typically passport and copy of the visa
3. Photocopy of Birth Certificate
4. Inspection & admission evidence such as Form I-94 Arrival-Departure Record or passport page with admission stamp.
5. Photocopy of Marriage certificate
6. Form I-944: Declaration of Self Sufficiency
This is a new form implemented by USCIS for filers after Feb. 24, 2020. It has 18 pages that require initial evidence as well.
7. Form I-864: Affidavit of Support
This form has 10 pages with supporting documents such as income tax returns, w-2 or 1099s, form 2555, etc., copy of your sponsor birth certificate, passport, or certificate of naturalization or citizenship.
REMEMBER: Failure to submit these 2 new forms will result in denial of your I-485 application for adjustment of status.
8. Copy of Vaccination Record
This was given to you when you completed your med. exam in St.lukes back in the Philippines.
9. Copy of your I-797C, Notice of Action/Approval Notice
10. Index page stating the breakdown of pages of your documents or a COVER LETTER with signature.
APPLICATION FOR EMPLOYMENT AUTHORIZATION DOCUMENT (EAD)
Filling up Form I-765 Application for Employment Authorization
While you apply for your permanent residency, it’s also essential to file for Employment Authorization.
This will allow you to have a working permit in the United States even though you’re still considered an alien or an immigrant.
This application has the same required documentation as the I-485 Form so you don’t need to provide another copy of requirements, just that you have to complete its separate forms and it’s about 7 pages.
But if you’ll be filing only EAD separately you have to pay $410 as filing fee and provide supporting documents or initial evidence such as:
Evidence of your admission (for example, a copy of your Form I-94, passport, or other travel documents)
Copy of your K visa
APPLICATION FOR TRAVEL DOCUMENT/ADVANCE PAROLE (AP)
Filling up FORM I-131 Application for Travel Document
If you’re planning to travel out of U.S while you are processing your adjustment of status, you can also file for I-131, Application for Travel Document (5 pages) as your re-entry permit.
But this I do not recommend, it’s better to travel once you already have your green card.
Most K1 visa holders include this application in emergency purposes just in case there will be an emergency to travel out of the United States you are sure to come back easily if you have your re-entry permit.
FILING I-485 AOS, I-765 EAD & I-131 AP
FILING FEE: $1,140
BIOMETRICS SERVICE FEE: $85
I-485, I-765, I-131 Filing Fee (2020) : $1,140 + biometric services fee of $85= Total of $1,225 made in single check
KIDS 13 yrs. and under filing with a parent in form I-485: $750
Kids filing separately: $1,140 (no biometric service fee)
WHERE TO FILE:USCIS Chicago Lockbox
For U.S. Postal Service (USPS):
USCIS
PO Box 805887
Chicago, IL 60680-4120
For FedEx, UPS, and DHL deliveries:
USCIS
Attn: FBAS
131 South Dearborn – 3rd Floor
Chicago, IL 60603-5517
Or you can call the National Customer Service Center FOR MORE CURRENT INFORMATION.
I hope this guides you throughout all the necessary documentation you need in filing your Adjustment of Status here in U.S. Now, I will share with you my timeline during our application to give an idea about the process and the letters or notice that you will receive from USCIS after you send all of these applications.
Before that, I want to illiterate that I only filed for AOS and EAD without AP so unlike most of the K1 visa filers I didn’t receive a combo card. If you filed all these 3 applications together then that’s when you receive a combo card but not in my case I received each document separately in different periods of time.
MY K-1 AOS TIMELINE
I-485 & I-765 Notice from USCIS
APRIL 13,2017: Receipt of I-485 & I-765 Notice from USCIS
The letter states the next step which is to wait for Biometric Appointment Schedule Notice.
MAY 5,2017: Receipt of ASC Appointment Notice
Stating Place of the Biometric Center
Date and Time of Appointment
Things to Bring on the Day of Appointment:
ASC Appointment Notice
Photo I.D such as passport, state-issued I.d, driver’s license, etc.
MAY 23,2017: Biometric Appointment Day
Approval Notice for I-765 Employment Authorization
More or less 10-20 minutes
After you’re done with biometrics, the officer will put a Biometric Processing Stamp on your ASC Appointment Notice
JULY 29,2017:Receipt of Approval Notice for I-765 Employment Authorization
The letter states that USCIS will send my EAD card (Employment Authorization Document) in a separate mail.
AUGUST 2017: Receipt of EAD Card
Finally got my EAD card.
Reminder: Check all your information in the card, if there’s some mistake request to USCIS to change what needs to be corrected as soon as possible to avoid future problems.
Your EAD card has only 1-year expiry.
So you have to have your green card already after your EAD expires.
EAD Card
AUGUST 10,2017: Application for SSN Valid for Work Only
If you’re already working here in the U.S, it is a must that you have your social security number. You should apply for your social security valid for work besides your EAD card.
AUGUST 21,2017: Receipt of SSN Card
DECEMBER 19,2017: Receipt of Request for I-485 AOS Initial Interview Notice
I-485 AOS Initial Interview Notice
A letter stating the Schedule of Interview with complete information such as Date, Time & Location
Things to Bring on Interview as per notice:
Both you and your petitioner which is already your (husband/wife) should be present during the interview
This Interview Notice
Government-issued photo I.d
Documentation establishing eligibility for permanent resident status
Employment Authorization (EAD) Card or Advance Parole (if any)
Travel documents such as passport, I-94 (Arrival/Departure Document) and or you Advance Parol document (if any)
Birth Certificates
Husband’s/Petitioner’s Birth Certificate
Husband’s/Petitioner’s Proof of Citizenship
If you have kids, bring their birth certificates too
Copy of Marriage Certificate
Divorce decrees/death certificates prior to marriage/former spouse (if applicable)
Relationship supporting documents such as joint bank statements, insurance documents, and other joint liabilities.
JANUARY 23,2018: Initial Interview Day
REMINDER: Arrive earlier than your scheduled time. Since before you get in at the main office there will be a security check and if there are a lot of people it will consume a lot of time.
Once your there, here are the steps you might experience during your’s too.
Show interview notice
Check-in and register then wait for your turn to be called.
Once called, both you and your spouse will go in a private office with the interviewer.
INTERVIEW QUESTIONS:
Asked for passports
How’s your married life?
How did you meet each other?
When and where did you get married?
How many kids do you have?
Asked for birth certificate of each petitioner & you
Asked for the birth certificate of baby
Are you both employed?
Be prepared for every document that you have, make sure to take it with you just in case your interviewer will ask for it.
Right after the interview the officer or the interviewer will hand down to you a letter which is the NOTICE OF INTERVIEW RESULTS which states that my case is being held for review and that my I-485 is complete and approvable.
My case will be transferred to TSC (Texas Service Center).
And also to allow no less than 120 days before making a status inquiry.
END OF JANUARY 2018: Receipt of Approval Notice for Permanent Resident Card
The notice states that the application or petition has been approved and might be asked for biometrics again within 90 days. But fortunately, I didn’t have to re-do my biometrics before.
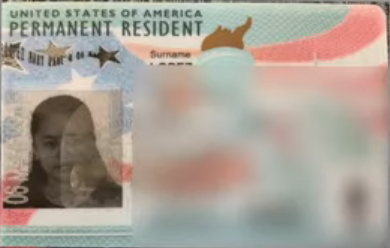
END OF JANUARY 2018: Receipt of Green Card/Permanent Resident Card
Finally, I got my green card on-hand. Make sure to check all your information on the card and if there’s any error call USCIS immediately so they correct it as soon and issue you a new card with corrected information.
This green card has 2 years expiry so I was advised to file removal of condition of my green card 90 days before my green card expires.
Green Card/Permanent Resident Card
These are the steps I’ve gone through when I applied for mine. Just a disclaimer, I’m not a lawyer nor a professional immigration officer, every information I share here are all based on my experience and search on the official website of USCIS.
Each case is different so you really have to do your self-research about your case, I would recommend going through the website of USCIS. If you’re a k1 applicant then I hope I give you some information that you need for your Adjustment of Status.
Please do read my other blogs about my K-1 visa journey here:
The application for K1 fiance visa is just the beginning of your journey going to the United States. I know it’s been quite a long process but I would like to CONGRATULATE you now for getting through all the hustle of filling up the initial forms and passing the interview! So now that you finally received your K-1 visa, what’s next?
Here are the next steps you should start doing after you received your passport stamped with the visa from U.S Embassy.
CFO SEMINAR (LAST STEP after Release of Visa)
It’s a guidance and counseling program or pre-departure orientation required by our government in the Philippines for fiances, spouses and other partners of foreign nationals or of former Filipino citizens. Given and promoted by Commission on Filipino Overseas to protect the welfare and safety of Filipino immigrants. This program can be taken in different locations around the Philippines, Manila, Cebu, Pampanga, and Davao.
CFO – CEBU (032) 255-5253 : 4th Floor, K&J Building #4 Don Julio Llorente St., Capitol Site, Cebu City 6000
Email: cfocebu@cfo.gov.ph
CFO – CLARK EXTENSION DESK (045) 499-8119 : One-Stop Processing Center in Clark (OSPC) Clark Polytechnic Compound, Jose Abad Santos Ave., Clark Freeport Zone
Email: info@cfo.gov.ph
Before going to their office, be sure to make an appointment online or you can contact the office first if you have any other inquiries and complete all the required documents. Also, prior to scheduling an appointment for CFO Seminar you have to have your passport already with the stamped visa in it.
REQUIREMENTS:
If you haven’t received your visa yet, CFO still allows you to take the counseling just comply on the following requirements:
Two valid I.D with a photograph
Completed guidance and counseling form from CFO
Valid passport
Valid visa
Completed emigrant registration form
Please provide the following if it’s applicable to you. (If you or your fiance have a previous marriage before)
Divorce decree/certificate
Annulment paper
CFO sticker k1 passport
Proof of residency/Alien Registration Card-ARC (for foreign fiance)
Proof of relationship (pictures together, chats, emails, etc.
Death certificate (widow/widower
REMEMBER: You should bring the printed barcoded confirmation form with you during your scheduled appointment or you can present the digital copy (either on your phone,pc or tablet) as long as your name and the reference number are there.
Even though you made an appointment online, it doesn’t mean that you will be in the priority list so arrive early than your appointment time since registration takes time.
The counseling is done in groups in a small room with one speaker/counselor. It takes about an hour and the release of the certificate is given on the same day after your counseling session.
Your passport will also be released with CFO sticker together with the CFO certificate.
On my experience, I thought I would need the CFO certificate at the airport during our flight and upon arrival at the port of entry but officers didn’t even ask for it. What’s more important is the CFO sticker that was on your passport.
Even though the certificate is not that of importance I would still recommend keeping it on your important documents so that whenever or whoever will ask for it you are always prepared.
CFO Certificate
BEFORE FLIGHT REMINDERS
Check all important documents especially the yellow packet/sealed envelope. Organize it in a clear book and bring it into your hand carry, NEVER put it on your luggage or suitcases.
Be aware of your luggage weight just so you won’t be charged for any extra fees at the airport. REMEMBER, do not bring prohibited items such as food, liquid especially illegal items.
ARRIVAL TO POINT OF ENTRY
In California, the first process we went through is immigration then CBP or Custom Border Protection Inspection and Interview then to baggage claim.
Lines were separated among U.S passport holders and foreign passport holders so I was by myself when we through Immigration and Customs.
This is why it is very important to have your important documents in your hand-carry luggage so that whenever and wherever you go you have with you all the time.
IMMIGRATION
First and foremost is, of course, passport verification.
There will be biometrics and photo capture when you pass through immigration.
If not all, most passengers pass by immigration so expect to spend some time here.
Then you’ll be asked to proceed to Customs and Border Protection.
CUSTOM AND BORDER PROTECTION (CBP)
Here you will meet the CBP Officer who will first ask for your passport again for verification.
Then together with your passport, hand over the Sealed Yellow Packet. Only the CBP Officer has the authority to tear the yellow packet and get the forms out of it.
After all the checking and verification of documents, the officer will start the interview.
Here are some of the questions I’ve experienced during my CBP interview.
INTERVIEW QUESTIONS:
When is the wedding?
Share a short story about how you met your fiancé.
Do you know your fiancé well? Is he a good man?
Have you talked to your fiancé’s family?
Did your family approve or accepted him?
Which city will you live here in California?
The officer also reminded me to get married within 90 days.
REMINDERS TO ALL K1 VISA HOLDERS: You have to get married within 90 days to your U.S petitioner upon admission since this timeframe cannot be extended.
After the interview, the CBP Officer started to scan my passport and other documents. She then returned my passport and kept the other documents.
Until then you could proceed to baggage claim.
BAGGAGE CLAIM
After going through all those procedures, finally going to the release and picking-up of your luggage and suitcases.
Some people go through further inspection of luggage before going out of the airport, officers ask to open your bags and investigate to each of the things you have inside.
Luckily in our case we didn’t go through further luggage inspection and just found ourselves straight to the gate going out of the airport.
These are the steps that you have to go through upon approval of your K-1 fiance visa. This is not the end of your visa journey yet since this is only the beginning of your AMERICA life and that there will be another process after you got married to your fiance and that would be the adjustment of status.
It will be a long journey but I assure you it will all be worth it once you’re done with everything.
I hope this gives you an idea of what to expect once you arrive in U.S.
Just a disclaimer, I’m not an expert, neither a lawyer. All information I shared with you here are all based on my experience.
I wish you a happy marriage and fruitful life ahead of your family!
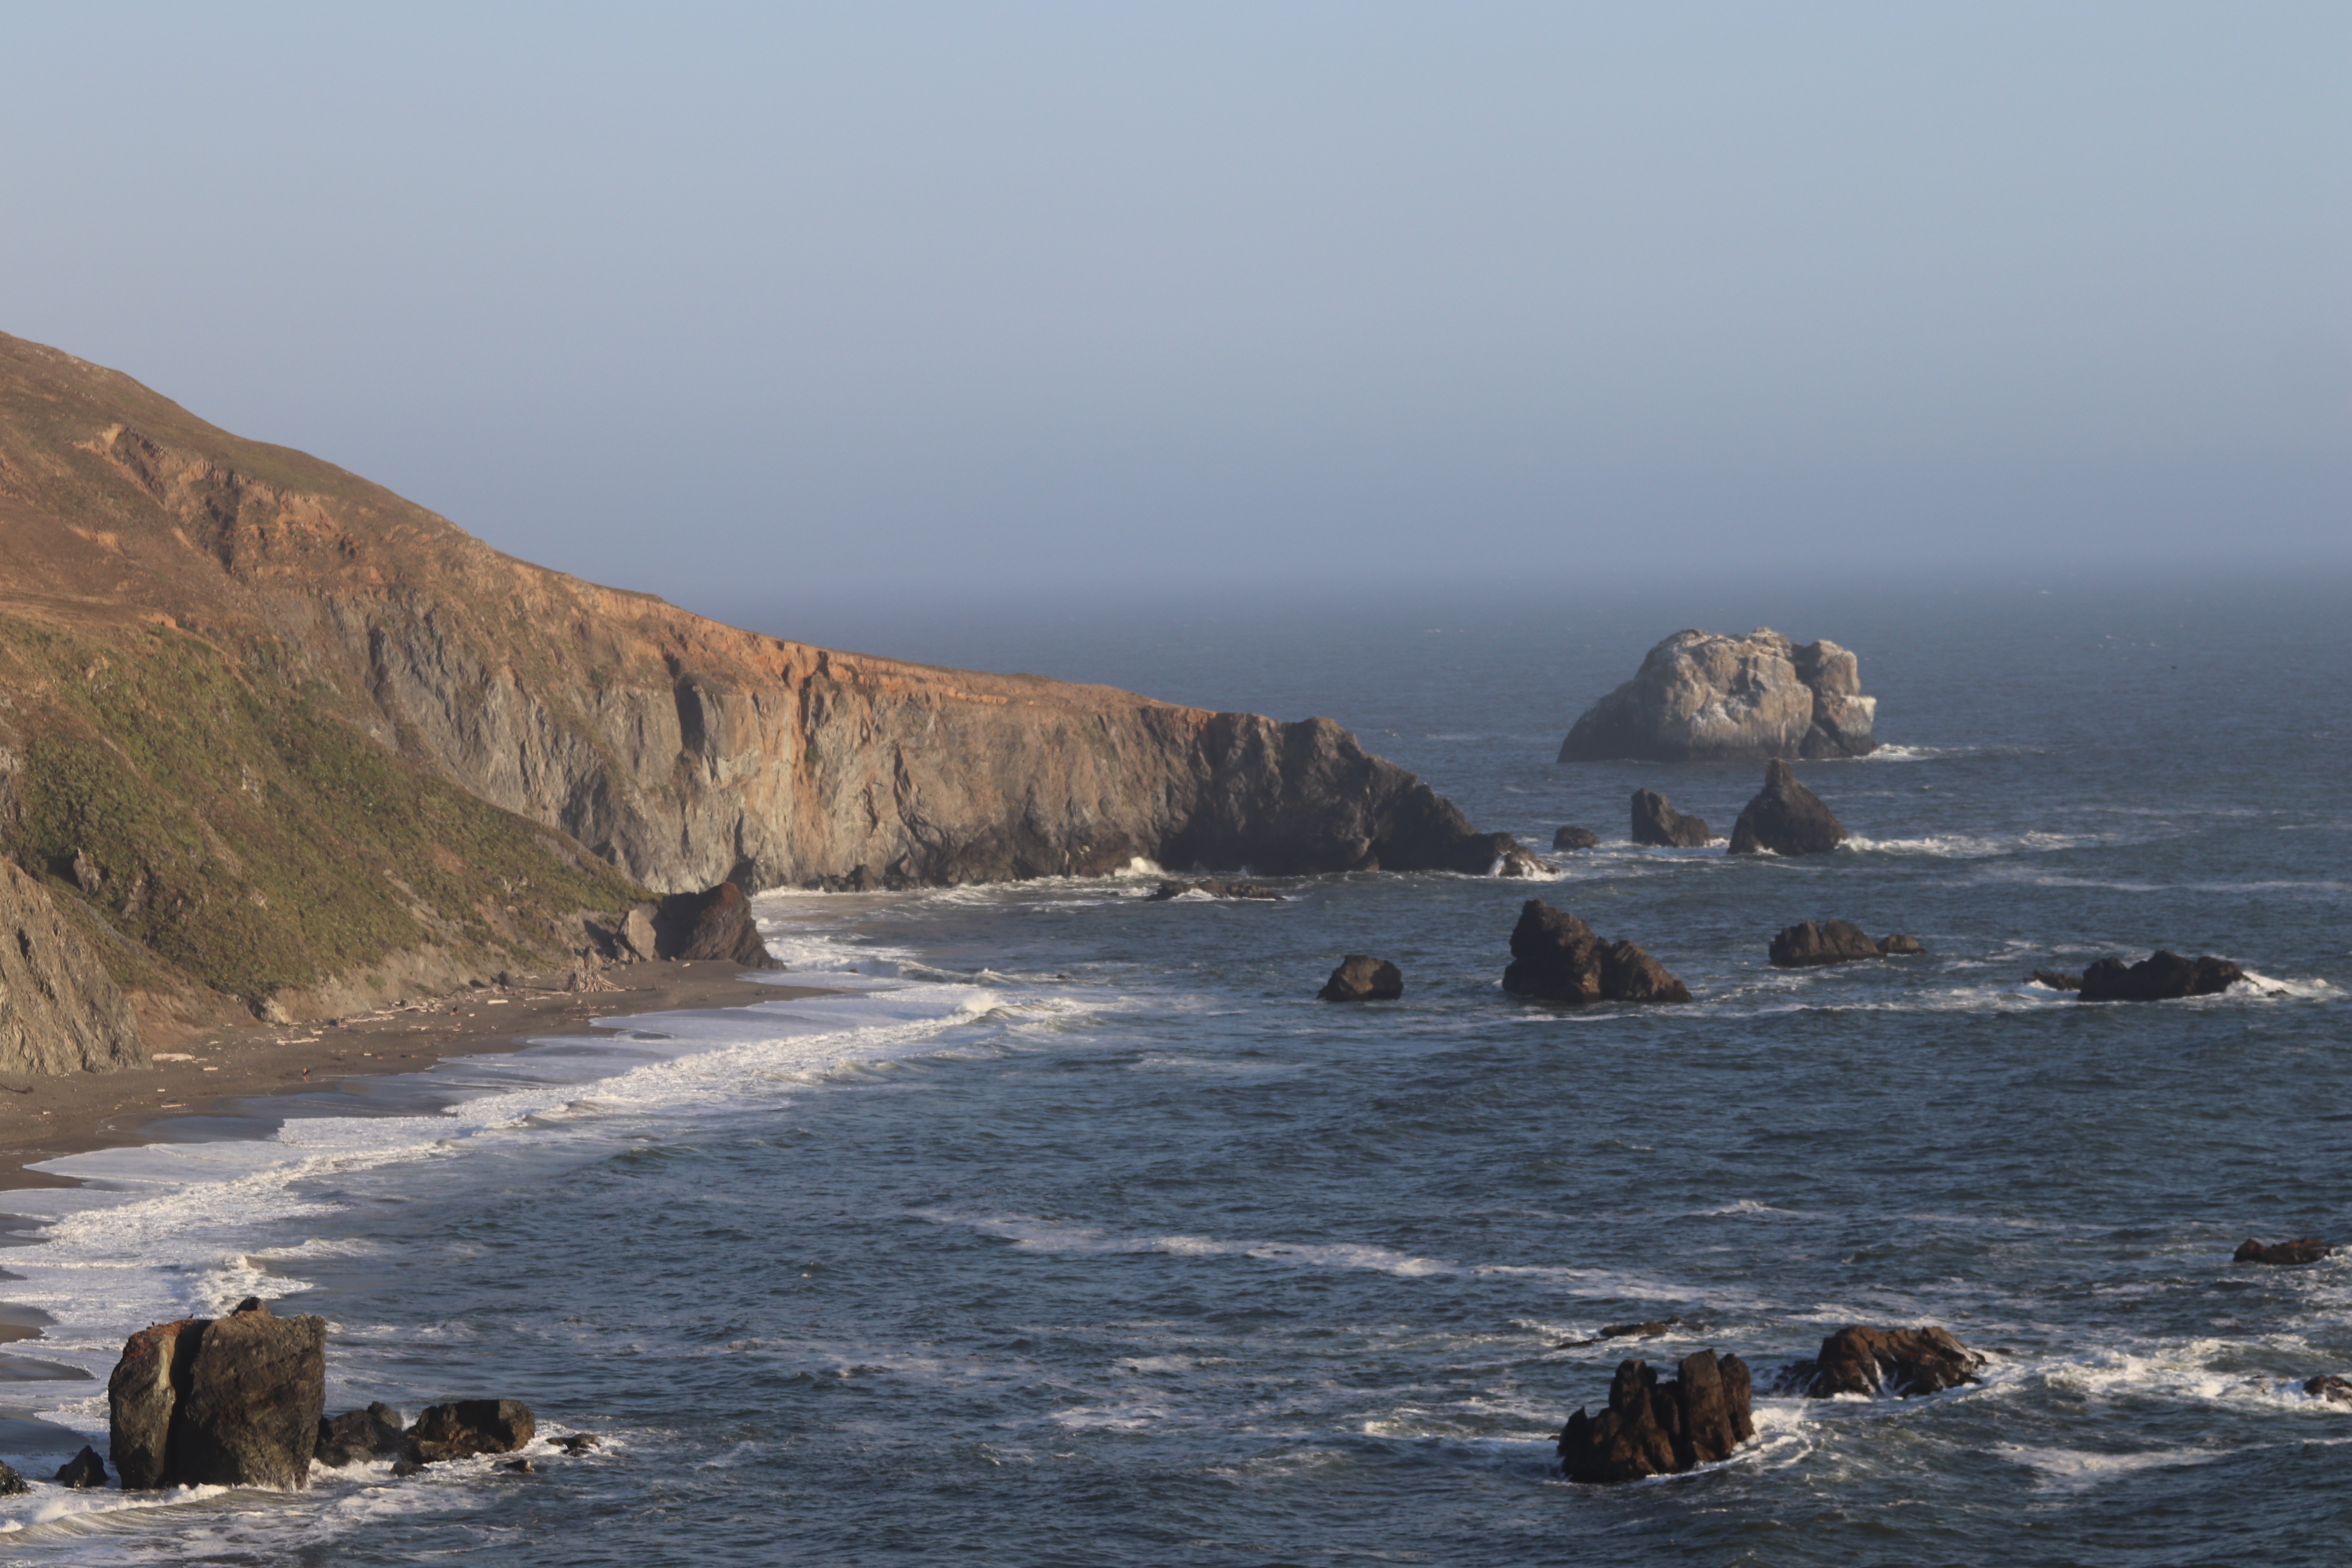
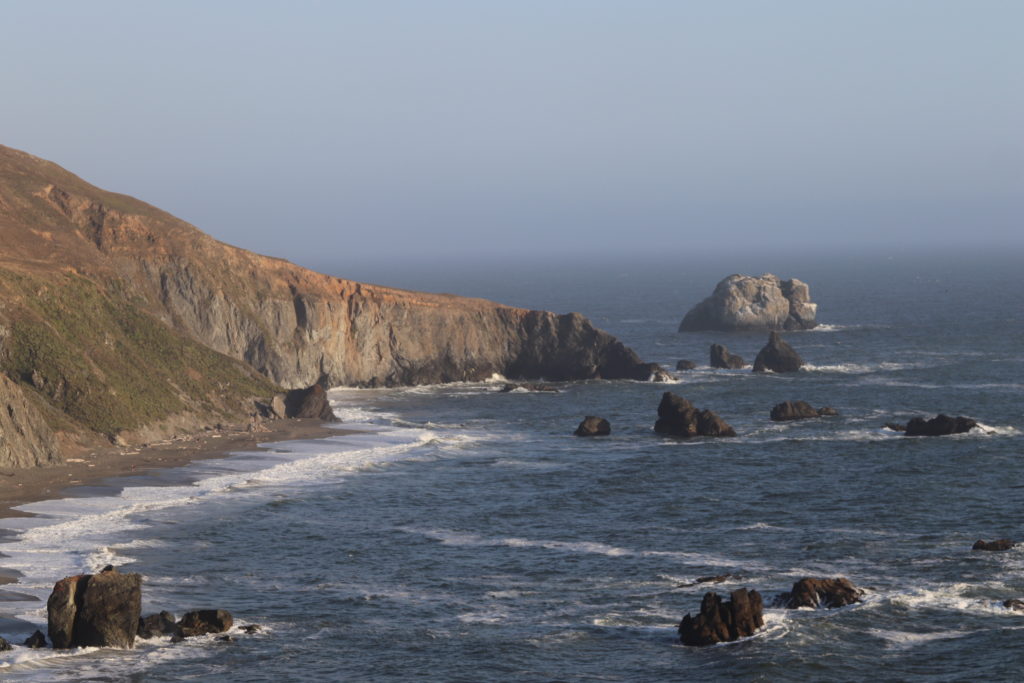
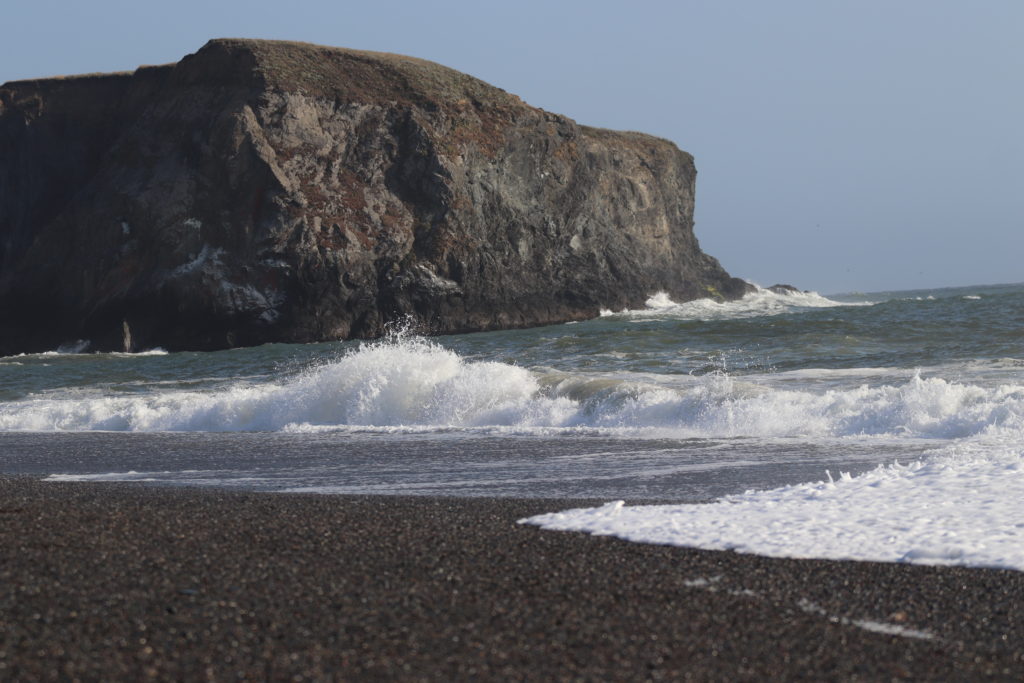
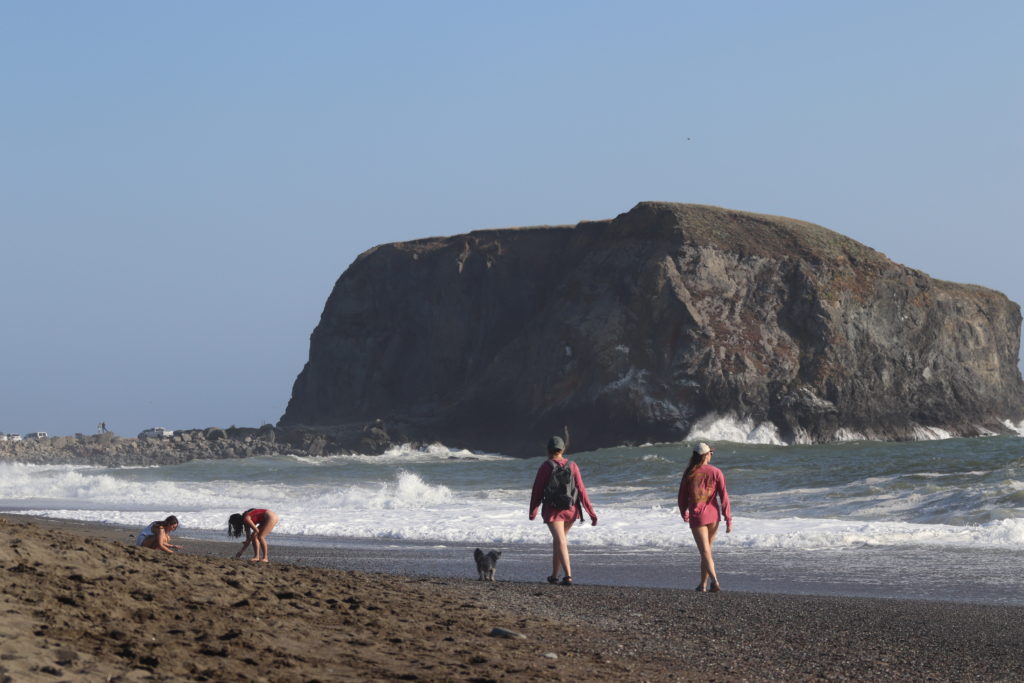
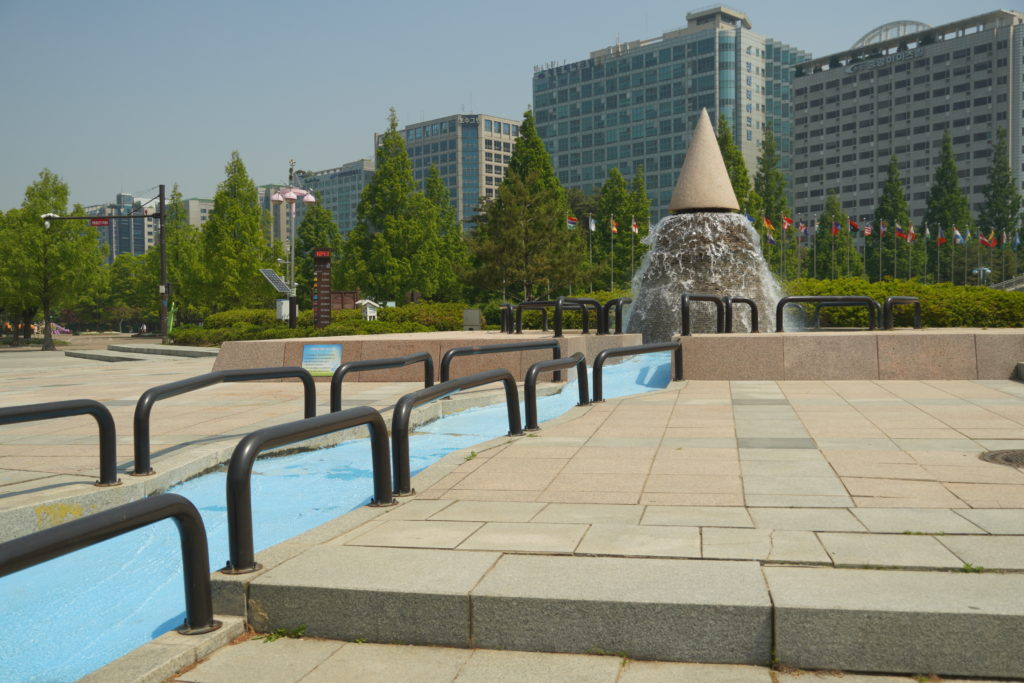
Indeed one of the most scenic place in California is Goat Rock Beach. One of California’s attractions that you should visit if you’re a traveler or a group of family seeking a wonderful kind of adventure.
Another day of unexpected getaway happened last weekend and it was an unforgettable experience in the serenity of nature. The beauty of this place is mesmerizing, the scenic views of the headlands, the long sand beach below it, the cliffs, the rock formations, the strong big waves from the ocean, and the wild life. It is such a perfect place to relax and breath after a long week.
We didn’t know what to expect before our arrival but when we got there, it was beyond what we thought it would be.
Sonoma Coast State Park is a rocky coastline with craggy cliffs bordering the pacific ocean located in Sonoma County at Bodega Bay, California. It features natural harbor and rock arches in rounded cliffs which divide many long sandy beach below its peninsula. The beaches are easily accessible by the public since it has a lot of entrance points and parking lots.
We chose to go to Goat Rock State Beach, quite distance away from other beaches. On our way, we passed through a lot of gift shops, souvenir shops and restaurants. We saw most travelers have their R.V’s and camping trucks and some have their surf boards and camping gears on top of their cars.
As we went through the rocky landscape, the astonishing scenery was breathtaking, it boost our excitement to get to the beach and see the water up close.
GOAT ROCK STATE BEACH
At Goat Rock State Beach located near the Russian River, home of harbor seal and some migrating whales.
It’s a long wide sandy beach located near the mouth of the Russian river, where you can see great rock arches and natural cove. The beach has a fine grayish to black sand and the rocks were composed of small pebbles in different shades. Upon entry, we already saw public restrooms and picnic tables along side the parking lot and small walking path towards the sand going to the beach.
We arrived late in the afternoon almost sunset, it was a perfect time since the temperature was not that hot and not so cold neither, just a super cool refreshing ocean breeze.
Nice getaway to escape from the heat of the city.
ACTIVITIES
We enjoyed playing beach volleyball, playing in the sand and running away from the huge waves. Some people were walking along the shoreline and some were just sitting and sun bathing. You can also try paragliding and kite flying!
But the most exciting thing that we saw in our visit was the whale and the seal! Unexpectedly they appeared in the wavy ocean just in front of the beach, although it was in a distant, we still recognized that it was a whale because of its size and because it was blowing water. And the seal came very close to the shore, it was swimming with the waves.
Watching migrating whale in front of the beach.
I didn’t get a good picture of the seal that was swimming in the ocean since the waves were too strong that it covered the seal so fast and it disappeared even before I made myself ready for the shot.
Anyway during some time of the day according to few articles I’ve read, you can really see a lot of them offshore, it will be just the timing if you get there on that specific time of the day.
THINGS TO KNOW!
1.Although Goat Rock Beach has the gorgeous views of beautiful long sand and relaxing surfing waves, it is not advisable to swim here since the waves are too strong and the sea floor drops deep and fast.
2. Dogs are not allowed, you can take your dog in the nearby beach, on Blind beach which is off the south parking lot of Goat Rock.
3. Fishing is also prohibited since Goat Rock beach is part of Russian River State Marine Conservation Area (SMRCA).
4. When watching seals or sea lions, authorities advised public to stay 50 yards away from it especially during between the months of March to August which is the pupping season.
5. Please be very careful with the water, always stay above the highest water marks in the sand. The waves are very dangerous so be cautious especially if you have little kids.
Another well spent weekend! You should never miss to visit this place once you are in California, it is such a wonderful adventure to the magical beauty of nature!
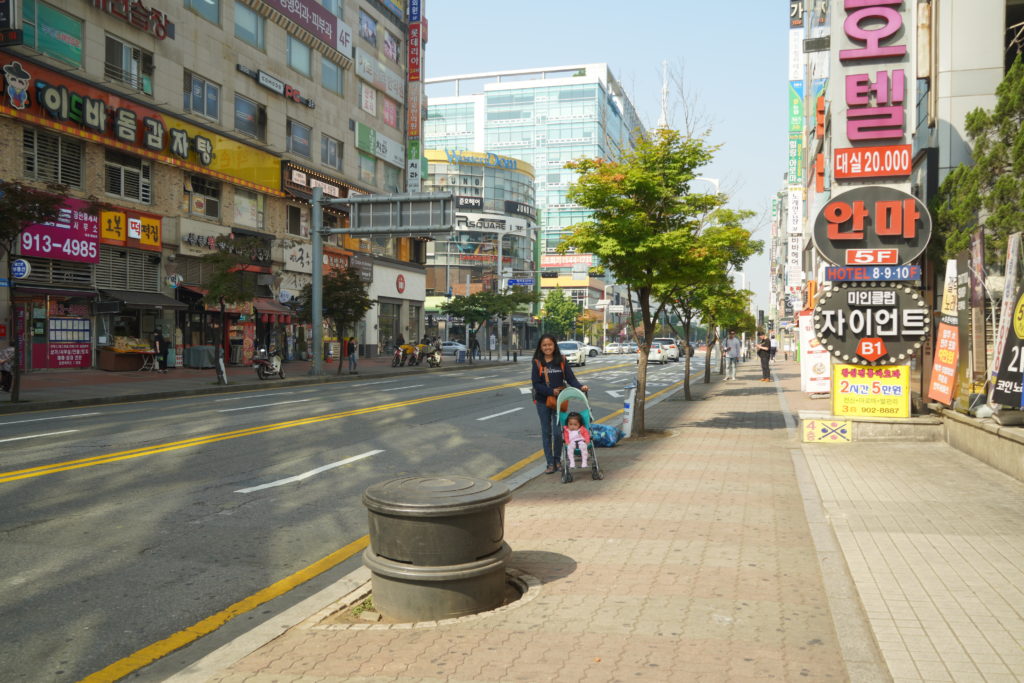
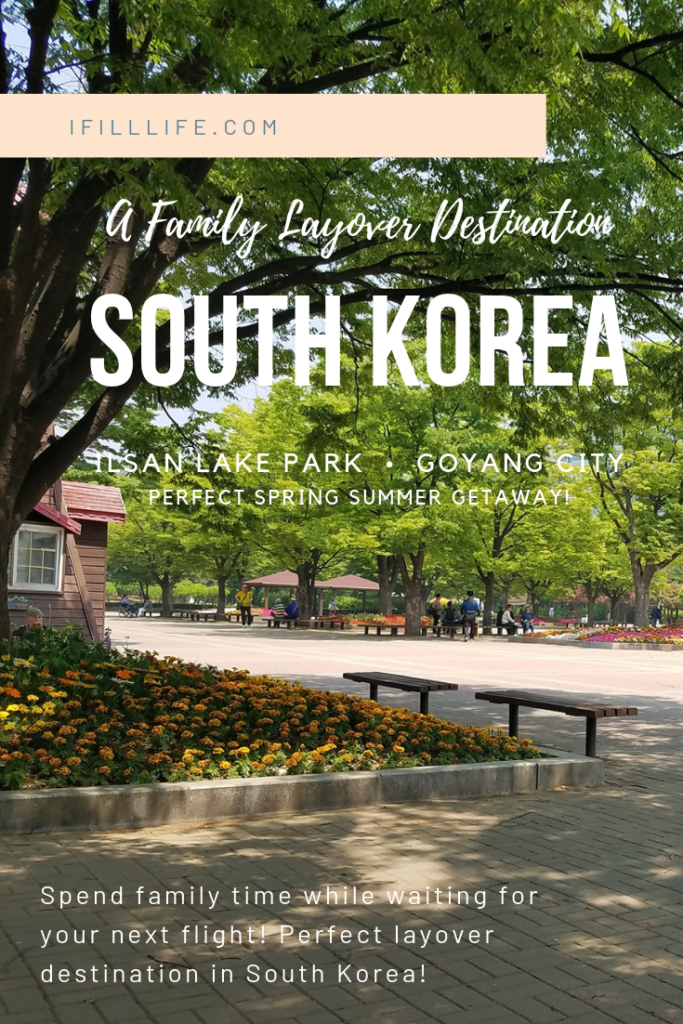
After our 2 weeks vacation in the Philippines, it was time for us to go back home in U.S but before we reached California, we decided to take a connecting flight from Philippines to Korea and layover for 15 hours before our next flight to California.
An exciting journey to South Korea begins when we first landed at Incheon Internatiol Airport at 4:00 in the morning. We are a family of three with a toddler so a long layover to a new place is perfect for another getaway! Being a spontaneous traveler as we are, we didn’t know first hand where to go since we haven’t really got a time to search for any destinations.
One of our mistakes when we got there was not able to look for the right destinations on the web and not able to find the right resources about touring options in Korea. It was only after all our fun journey at Ilsan Lake when we discovered that at the airport, they have a transit tour desk where they offer free transit tours including guided tours around popular destinations in Seoul.
Even though we didn’t know about it, somehow we managed to find the perfect spot for us to enjoy our time in South Korea and that was in Goyang City at Ilsan Lake Park. We took a taxi and in about an hour we decided to drop ourselves off in a restaurant for breakfast.
Ilsan Goyang, South Korea
Located in the north, South Korea, Goyang City is one of the largest city in Seoul capital area. It is a city in Gyeonggi Province where the most popular flower festival takes place every early April.
We arrived in the city early morning, the weather was a little cold so we had to take a warm soup and coffee for breakfast. As it gets to noon, the temperature went from cool to warm.
Strolling around Ilsan, Goyang City after a nice breakfast!
Most of the stores and restaurants were still closed and there were not a lot of people around. We walked through places where we could ask someone for directions going to Ilsan Lake park. We went to ask a taxi driver but like most of the locals, he doesn’t speak and understand English so it was a struggle for us to communicate. Fortunately, there was one guy who curiously asked us where we were heading, he spoke a little English and just pointed us where to go and that the park was only walking distance away.
Ilsan Lake Park
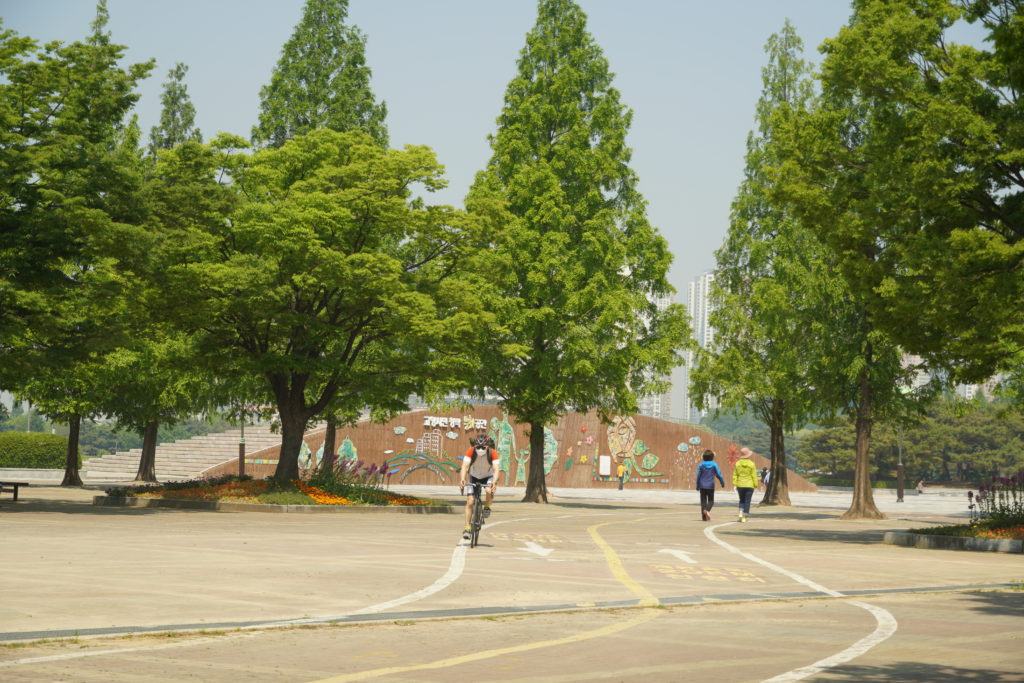
Ilsan lake park is a city park located in Janhang-dong, Ilsan-gu District in Goyang City. It is a wide beautiful park of greenery of trees and rainbows of flowers in the middle of the urban area. Ilsan lake is considered to be the largest man-made lake in Asia covering an area of 300,000 sq. meters. A wide area for family to enjoy picnic and do some activities like running, walking and biking. It’s free admission only pay for parking fees.
We walked few miles away from the place of the restaurant to the park. It was very convenient for a family like us to just walk and stroll our baby around the city of Ilsan. Since it was only about 7 a.m, we arrived at the park with no hustle.
Peaceful atmosphere in Ilsan Lake ParkDiscover some amazing art works while strolling around the park.Huge water fountain in the middle of the wide Ilsan Park.
Perfect for Relaxation
The park has a wide area of paved pathway and refreshing environment. You can enjoy the scenery of colorful flowers under the trees, sit on benches and relax in small huts and feel the cool wind from the lake.
We got our one luggage and 2 backpacks with us plus the stroller of our little one, it was not much but somehow it made us tired of walking. We took ourselves to one of the benches close to the lake. Sat and relaxed ourselves with the cooling wind blowing from the trees while we watched some people who were with their families or group of friends chatting at each other, also enjoying themselves with the beautiful view.
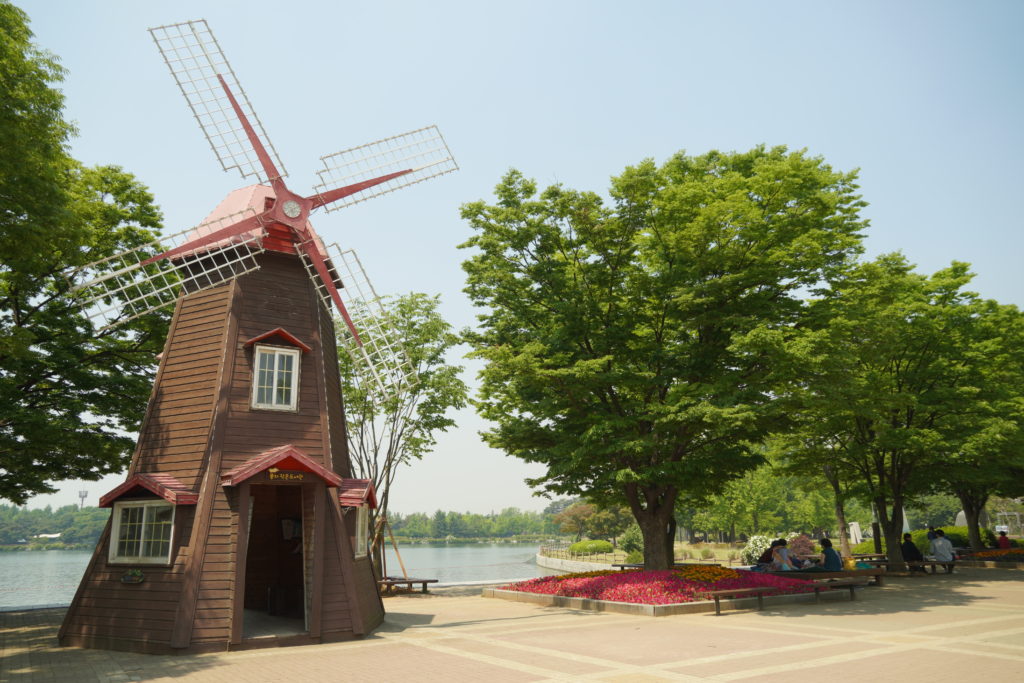
Fountains in the wide lake of Ilsan. Windmill Tower, Ilsan Lake Park
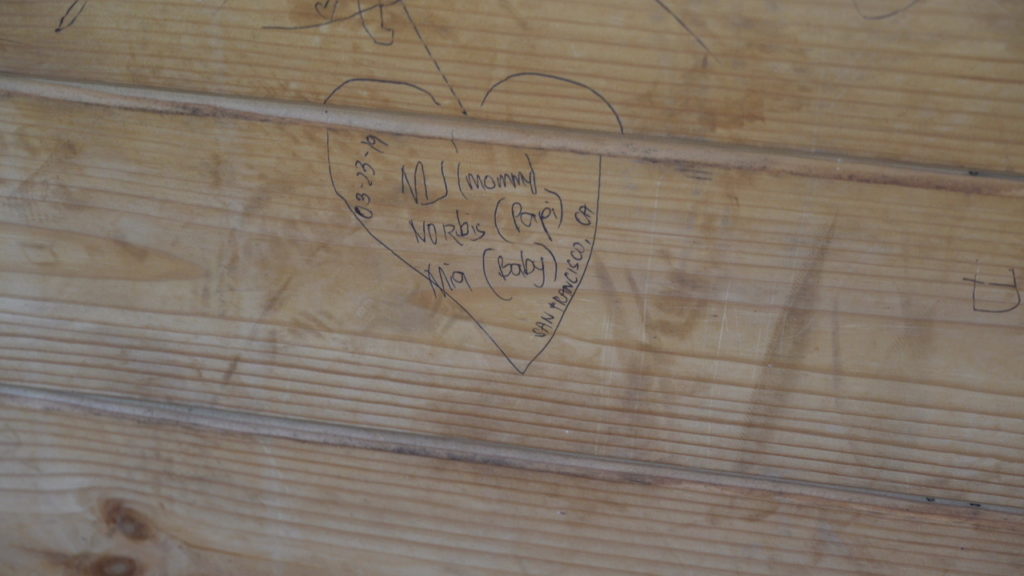
Inside the tower, we found an automatic blood pressure machine in which you have to put your arm in it and wait for one minute to get your b.p measured.
And one more interesting thing to see inside was the writings on the walls, people have written their names and everything else around the walls. Some were messages and some were random Korean writings.
Since we were already there and it was our first time in Korea, we decided to write our names there too just for fun and for the memories as well.
A memory to keep.
Right Place for Kids Fun & Learning
What a brilliant idea to have a mini book shelf like this in a park. Kids can do reading, learning and playing at the same time! This easily attracts kids, with those curious minds, with no doubt they would run towards it and try to grab one book.
Our little one, who loved books, excitedly runs towards the shelf and tried to reach one but unfortunately the books were written in Korean. We couldn’t understand a thing since the writings are very different.
Mini Book Shelf, tiny library at Ilsan Park. Mia loved the beautiful flowers, she pointed at each one and tried to pronounce the colors of each.
Strolling and Exercise
A good place for exercise like walking, running, jogging and cycling. Ilsan park is most recommended among families and big groups who wanted to spend quality time together while doing some fun activities for exercise.
Its a perfect spot for us after a long travel and also just the right place to be to wait for our next flight. We would have gone to a lot more places if we chose to take the tour that they offer in the airport but we didn’t regret anything since our little one really enjoyed walking and running around the park.
Few Koreans exercising early morning at Ilsan Park.
WHAT MORE TO SEE?
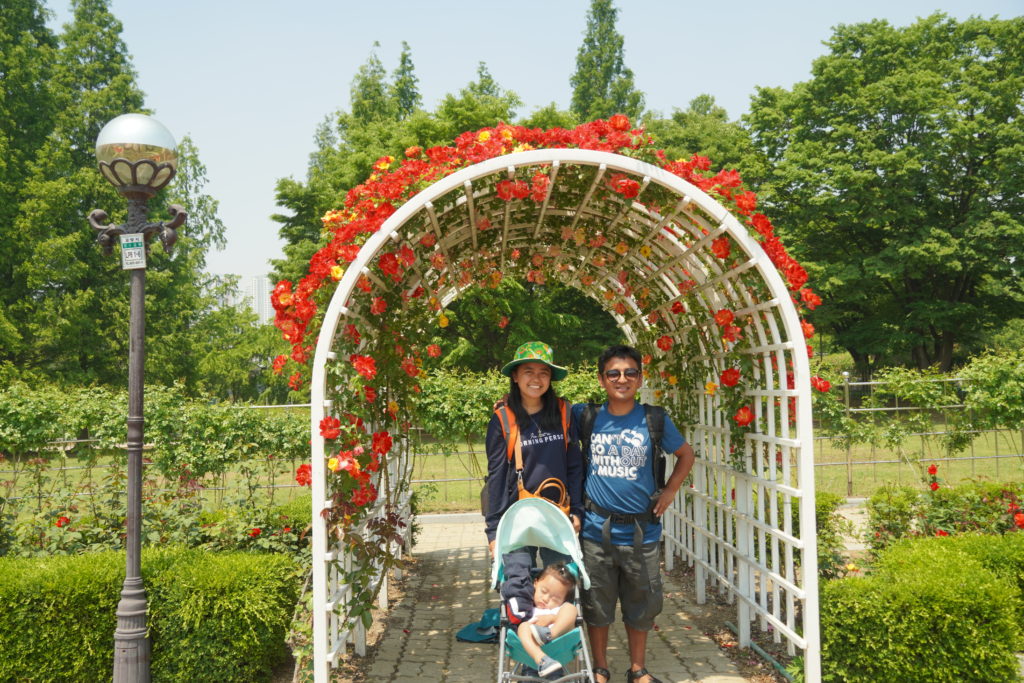
The Beautiful Rose Garden
Still inside the park in few miles away, visit the colorful rose garden. It is in full bloom during this month of May till June. Roses are in arches and in beautiful landscape.
I got more excited when I saw the garden from afar for I have not known that there was a rose garden in this park. It was quite a dream for me to see a wide garden full of different kinds of roses since I’m really a fan of the colors of flowers in gardens as such. The colors were amazing, indeed it was such a nice refreshing scenery.
The lady monument standing proud as the center piece of the rose garden.Our sweet Mia fell asleep after getting tired of playing.
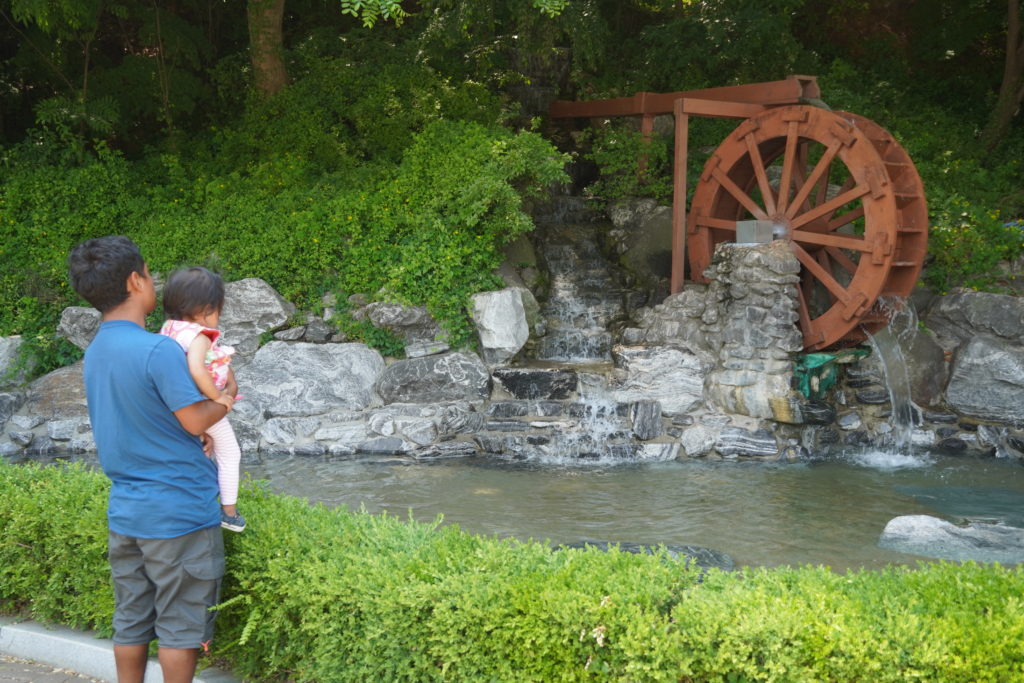
The Wooden Water Turbine
On the side of the wood turbine is a small landscaped falls.
Walk few more miles to reach the wood water turbine. There are small cottages on the side if you want to sit, lay or relax. Such a refreshing spot to rest, with a soothing sound of the running water from the falls and the wooden turbine.
When we got here, there were some group of old ladies who were enjoying their lunch in one of the cottages and one who was doing some meditation on the other cottage.
Ilsan Lake Park was indeed a perfect getaway for us and also just the right place to spend our time before taking our next flight. A long layover in one foreign country like Korea means a journey to explore little bit of the place appreciate it with nature all at the same time. It was definitely worth the travel and adventure!
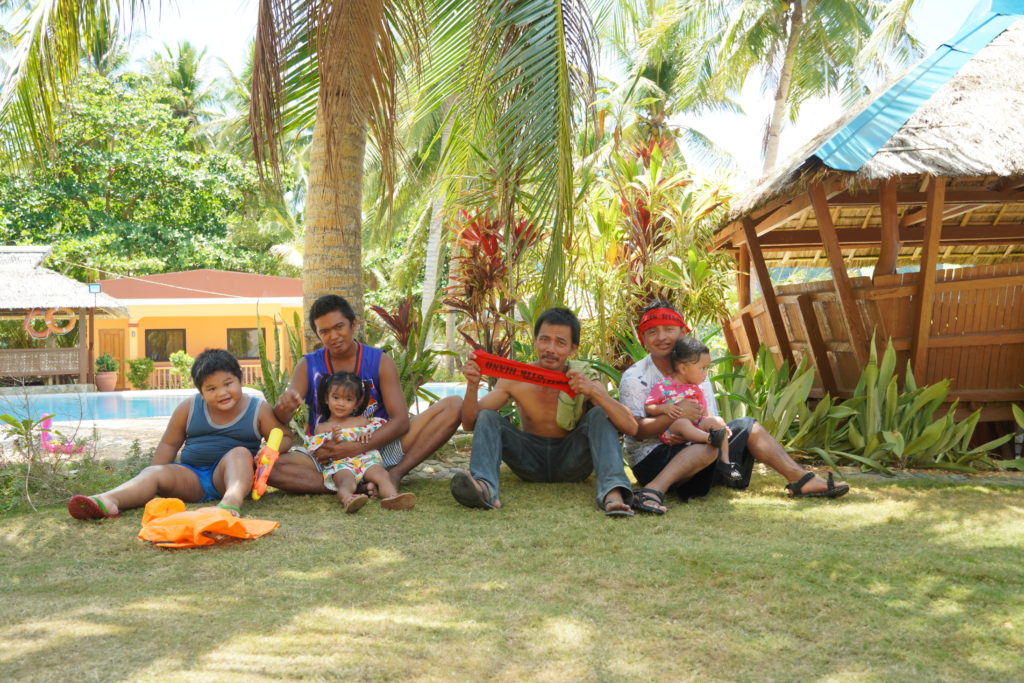
It was our first time to experience an international travel having a toddler on a plane going to the other side of the world, in the Philippines. Although we knew how hard the travel would be, we still wanted to go for it was also the wish of my Mom who longed to see her grand daughter for the first time. When my husband and I both decided to spend our summer vacation in the Philippines, we thought that it was a perfect timing for Mia to enjoy the beauty of the country and at the same time to meet other family relatives who lives there such as her grandma, great grandparents, auntie’s, uncles and cousins.
It was our first family vacation in Romblon, my island home. We stayed for more than 2 weeks and we explored places as much as we could. Listed here are places you can visit with your whole family once you visit Romblon, Romblon in the Philippines. It’s a short easy travel guide that gives you ideas on where to go with your whole family once you visit this beautiful island. You can also visit my previous post about Romblon for more travel destination!
ABOUT ROMBLON,ROMBLON
It is the capital of the province Romblon in the Philippines. It’s one of the three main islands comprising the province aside from Sibuyan and Tablas islands. It is the center of marble industry of the country and also most popular among tourists for its unspoiled white sand beaches.
Natives or locals of Romblon are called Romblonanons. Since Romblon is part of Visayan ethnoliguistic group, locals have their own Visayan dialect, like how wikipedia described it, the dialect is called Ili, its mixed hiligaynon and cebuano.
Summer season starts in April and peaks in the month of May. Rainy season starts from June onwards. Highest temperature would be during summer in May, where it can peak up to 38 degrees Celsius or a little higher than that.
HOW TO GET THERE?
One of the main transportation that you can use to get to the island of Romblon, Romblon is through a RORO vessel in Batangas Pier or in Lucena. Vessels are from 2go travels, Montenegro Shipping Lines, Navios Shipping Lines in Batangas and Starhorse Shipping in Lucena. Please refer to their official websites for trip schedule. Travel time is approximately 7-9 hours depending on the speed of the roro vessel and the weather.
Or if you wish to take the plane, the only airport close by to the island is in Tugdan, in Tablas island. You can take a jeepney from Tugdan to San Agustin where you can catch another RORO vessel going to Romblon, Romblon.
WHERE TO GO?
BEACH HOPPING
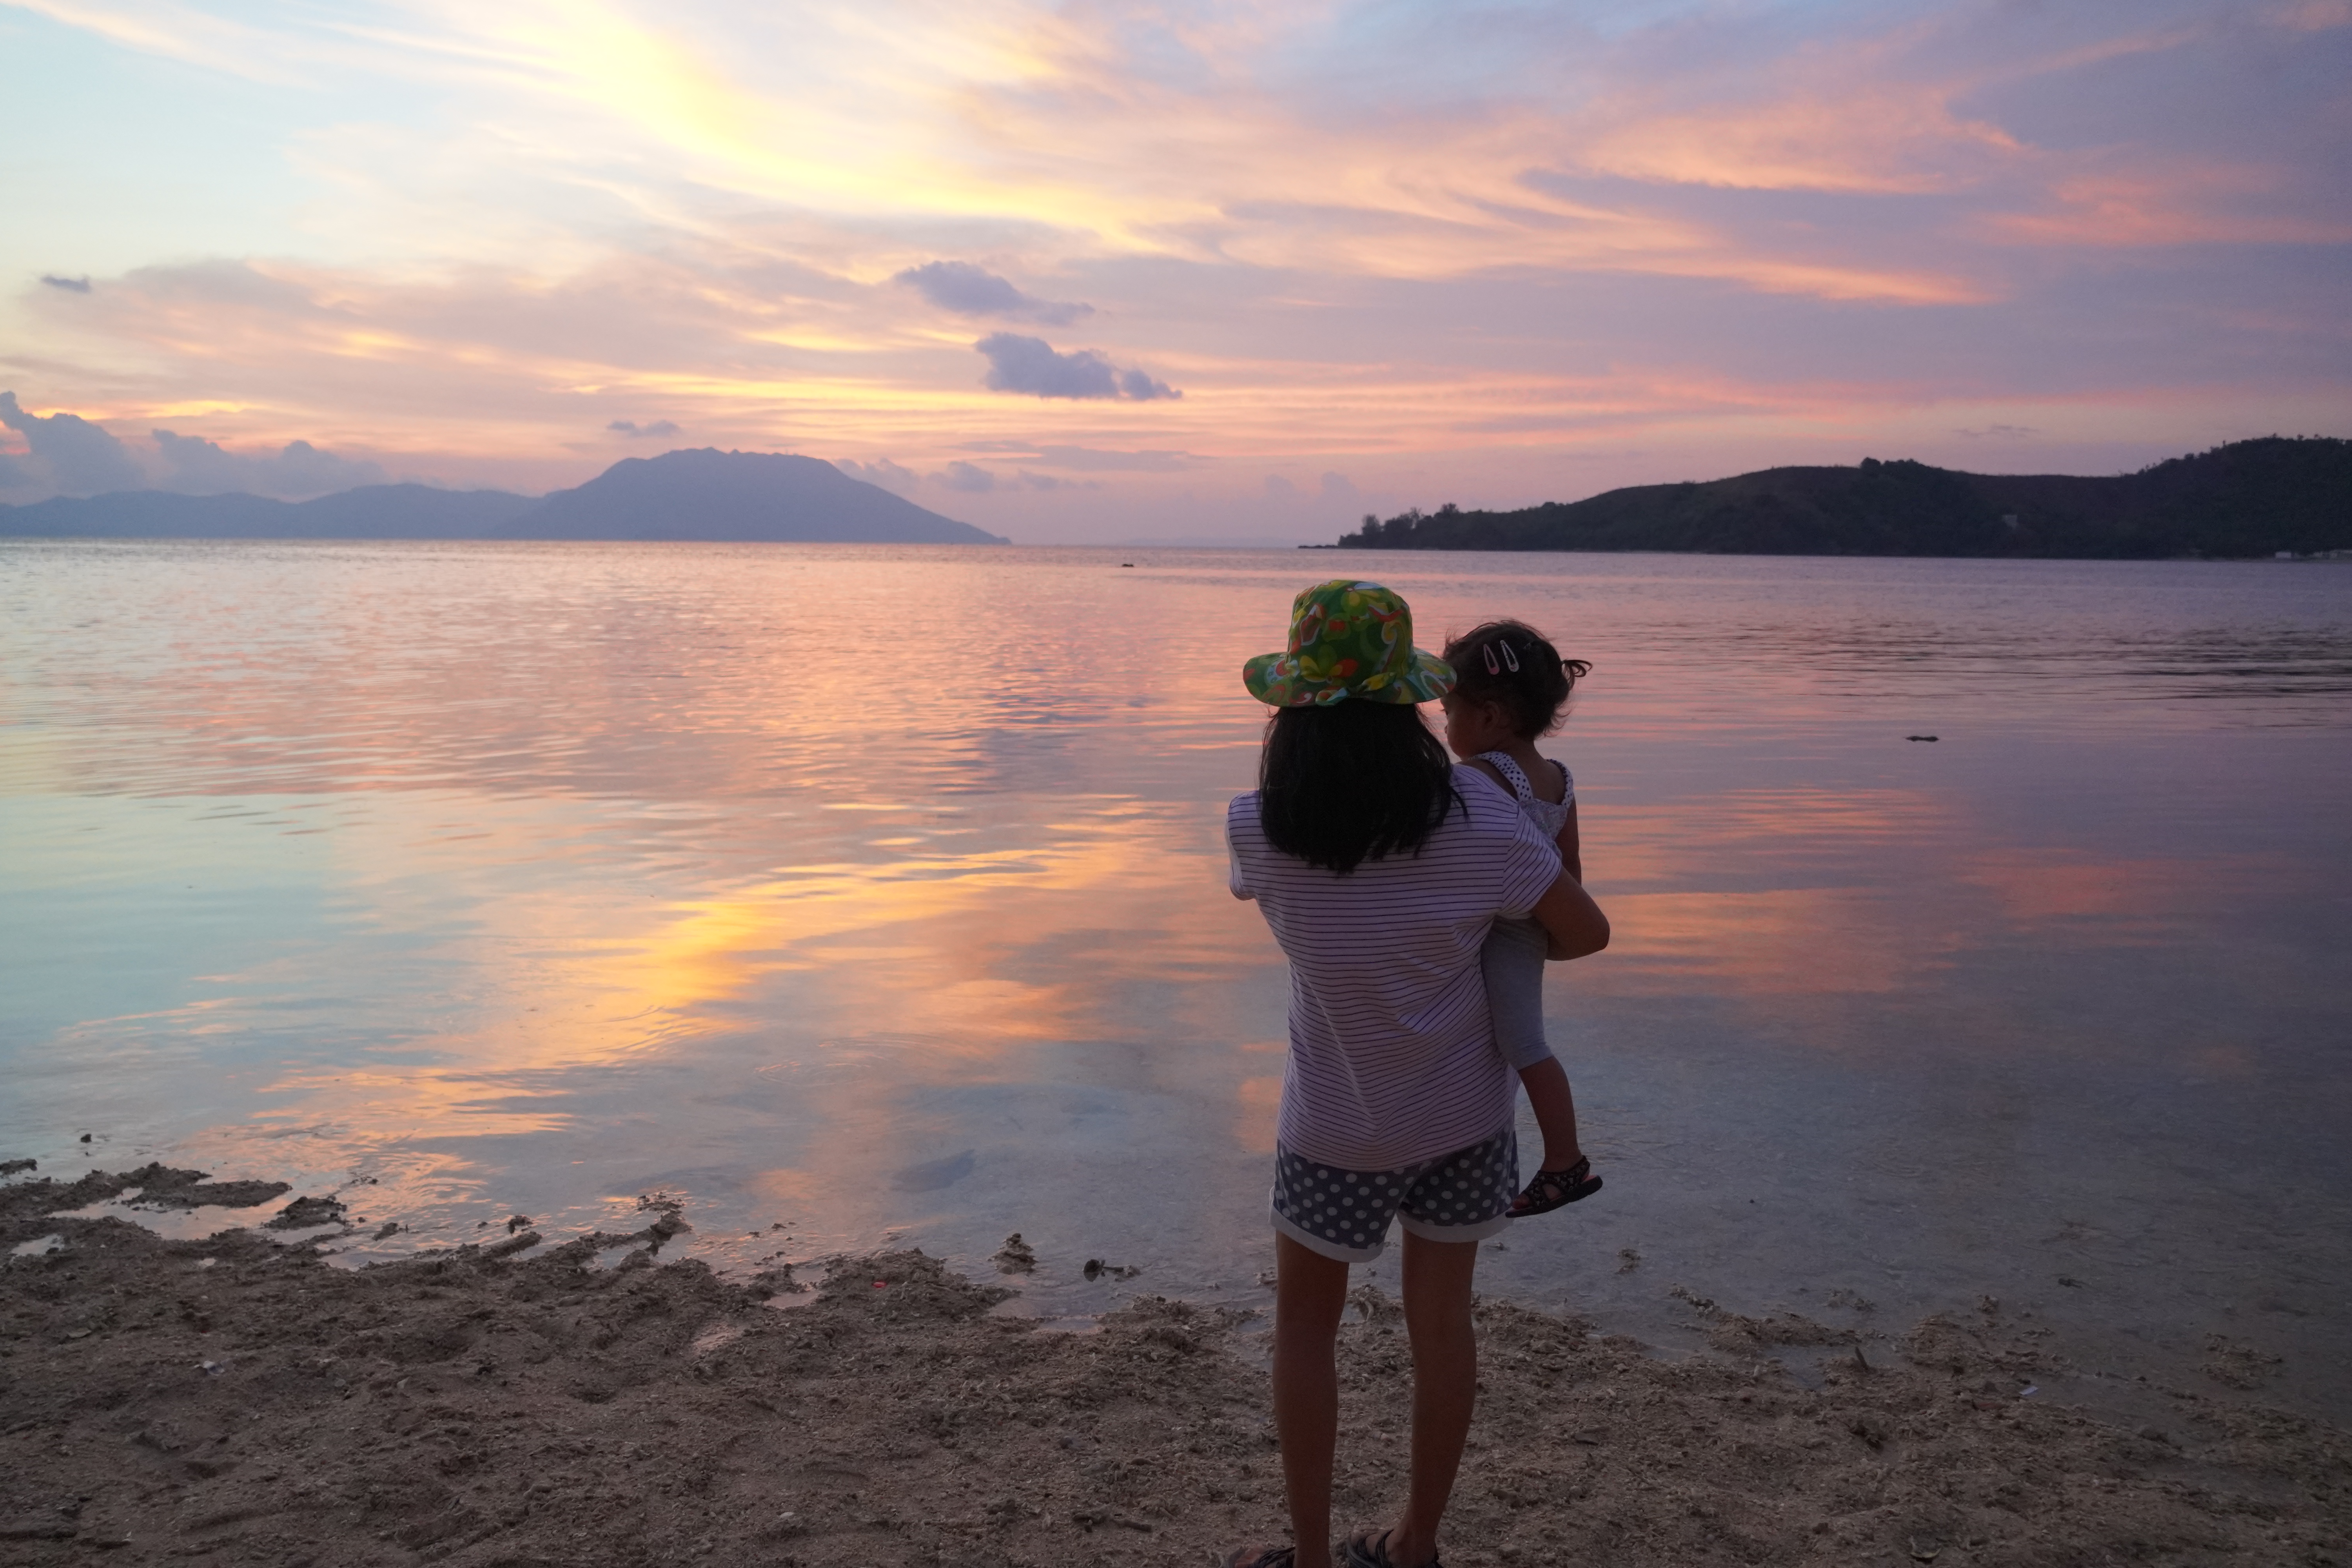
1. Bonbon Beach- Brgy. Lonos
Bonbon Beach is the main tourist attraction in Romblon, Romblon. It became the most popular beach among all the white sand beaches in Romblon because of its long white sand bar that extends to Bang-og island. It has a fine white sand with calm waters and clear shore, best for swimming or diving.
For you to get there, you can rent a motorcycle or ride a tricycle going to Brgy. Lonos, probably it’s about 10 minutes away from the main town. As of the moment, the beach is open to the public free of charge, you can enjoy the beautiful beach during sunrise at 6 a.m until sunset at 7 p.m.
The views are amazing and extraordinary during sunset, when the weather is good and calm, the skies are filled with vibrant colors. There are also less tourists during this time so you can really enjoy the nature and the quiet environment.
2
2. Lamao Beach and Restaurant- Brgy. Lamao
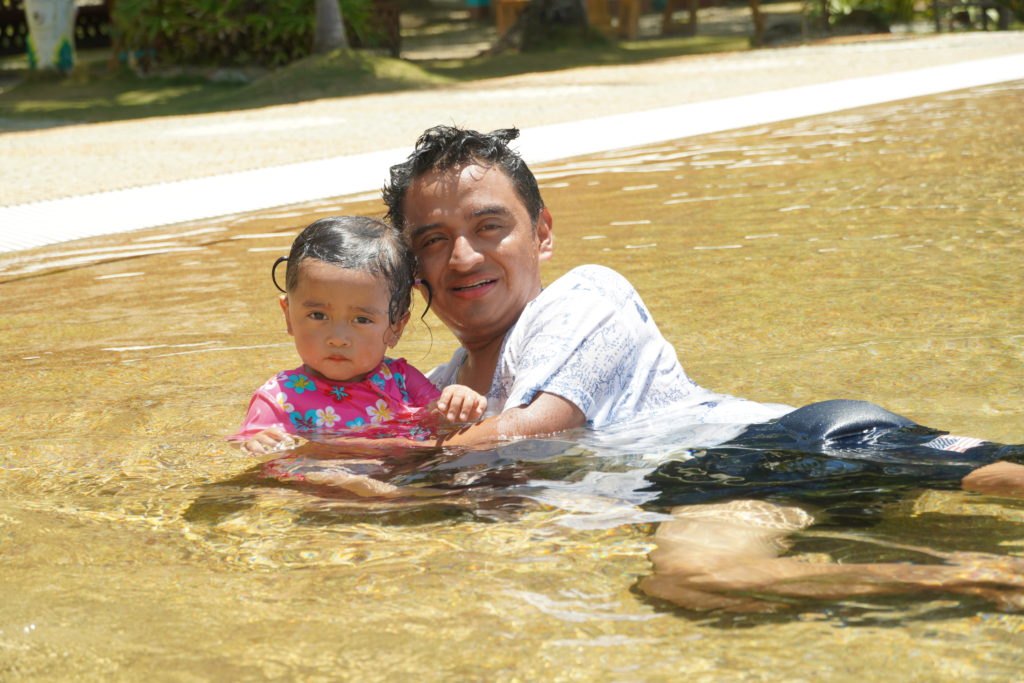
Located opposite way from bonbon beach is going to Lamao, which is at the other side of the island. Here lies a beautiful and relaxing resort with a swimming pool overlooking a nice white sand beach close to a small island called Puyo. There were coconut trees which provide shades in paved walking pathway going to the pool and towards the beach.
Lamao Beach Resort and restaurant is privately owned and an entrance fee is required upon entering the property. Entrance fees vary depending on age , adults is 70 pesos ($1.5) per head and kids is about 40 (>$1)pesos for each. There are also nipa huts for guests to rent for short time visit and for longer stays as well. For shorter visits, the large size hut costs about 500 pesos ($10) and 300 ($6) pesos for the small ones. They also have an accommodation if you wish to stay for more than a day, you can choose between air conditioned rooms to a regular one that has only a fan.
Guests are allowed to bring their own food inside. But if you wish to grill and barbecue you can also rent a griller and buy charcoal in their mini store.
The road going here is quite steep but once you’re there the experience will be worth your travel! For your convenience, you can rent your own motorbike or tricycle if you want to tour the whole island.
3. Nonok Beach, Brgy. Lonos
3. Nonok Beach- Brgy. Lonos
Nonok beach is a small yet a very nice private beach that has pristine beauty of the ocean and fine white sand. Entrance fee is 50 pesos ($1) for each adult and less for kids. They offer several amenities such as air conditioned rooms, tree houses, huts, tents, tables, water slide and even boats or kayaks for guests to rent.
This is the place we visit most of the time since it’s only few distance from our house in Romblon and it’s easily accessible, its just beside the main road.
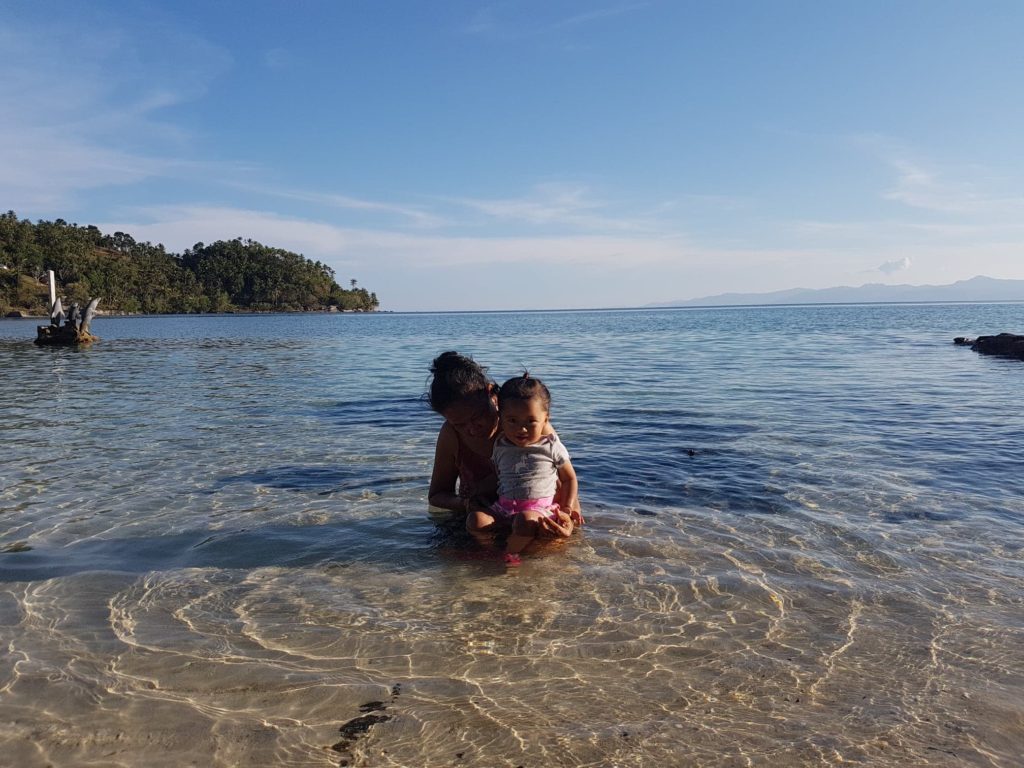
Mia loved being in the water and play in the sand. She also enjoyed her time with grandma when they both go to swim every afternoon before sunset. It’s the perfect spot to relax and cool off while having some precious time with your loved ones during sunset.
4. San Pedro Beach in Talipasak
San Pedro beach is located in Talipasak, Romblon, it is a family owned resort which has been open to the public even before Romblon became a tourist destination. It’s a little far from the town, almost about 20-25 minutes away drive. It’s a best getaway for people who want more peace and more tranquility of nature. Since it’s privately owned, guests or visitors also pay entrance fee worth 50 pesos ($1) per person.
Nipa huts are also available for guests to rent if you wish to stay overnight or for a few days. There’s also a big restaurant where you can order food and drinks.
I remember before during my childhood days when my Dad used to take me with his foreigner friends to tour around the island, San Pedro beach will always be one of our destination. Our recent visit reminded me of the old times, nothing really change at all. From the classic look of their restaurant, the quiet environment, the beautiful view of the beach and the hammocks, it brought back a lot of memories.
5. Cordova’s Resort, Brgy. Ginablan
5. Cordova’s Resort- Brgy. Ginablan
About 30 minutes away from the town of Romblon, Cordova Resort lies almost in the border of Brgy. Ginablan and Brgy. Agnipa. This is also a privately owned resort with an entrance fee that costs 50 pesos ($1) per individual. The resort features a small pool for swimming and a display of different marble structures of animals and other gigantic human like marble figures.
There are amenities such as huts or bungalows and set of table and chairs for guests to rent. They also have air conditioned rooms for groups or families who wish to stay for an overnight or for a longer stay. Kindly refer to their facebook page for more details.
The most interesting to see in this place are the different marble structures in display from the entrance way to the beautiful garden all the way to the swimming area. The arts and craftsmanship of Romblamanon artists are truly amazing.
Hilltop view road to windmill
Aside from beach hopping, you can also do island hopping which is of course a more exciting adventure for your whole family! There are more to explore and way more to experience in this beautiful island, please do read my other blogs for more!
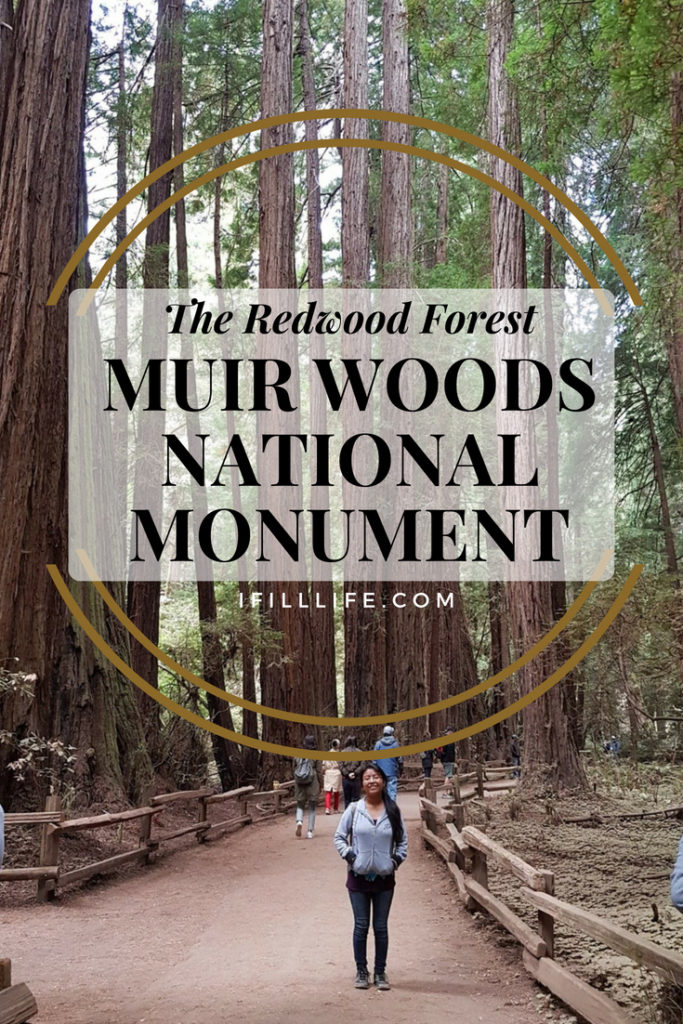
August 19, 2018 marks the 11th month birthday of our little princess and to make this day very special we planned a trip to one of the most popular destination near San Francisco. We took a hike to the amazing heritage of redwoods in Muir Woods National Monument in Mill Valley. In this post you will expect a story of an amazing adventure, be excited to discover Muir Woods precious gems and be amazed how these gems preserved itself for over a hundred to thousand years.
Muir Woods National Monument is very famous tourist destination near San Francisco thus a crowd of tourists visit this place everyday. We made a parking reservation online a week ahead of our visit, parking fee was $8, this is a requirement for all vehicle riders. There’s also a shuttle reservation available on their website.
Pre-trip Preparation & Traveling
We prepared ourselves before driving off to Muir Woods. A short background was really helpful, we’ve known the weather condition so we dressed up right for it, we had our jackets and rubber shoes ready for the cold and the hike! We got our packed food and drinks although food is not allowed inside the park proper, there’s a picnic area allocated for visitors outside visitor’s center prior entrance to the park.
Traveling with an infant needs more than just packing, as parents we need to make sure that we have everything with us and these were basically her necessities including her outdoor essentials. And since this trip was going to be a long hiking and trekking, a baby carrier was the one on top of my baby’s list. For more baby’s outdoor essentials, check my previous post just for reminders on what to bring in case you’re up for an outdoor activity!
We wanted to have a whole day adventure so we decided to leave home as early as 6 in the morning. Traveling to San Francisco early in the morning was less hassle since there was less traffic and we got to see some beautiful sights like sunrise along the way, from Vallejo it only took us about 30-40 minutes to get there. The road going to Muir Woods was a little bit scary, it was narrow and stiff that’s why RV’s or vehicles longer than 35 feet are not allowed or permitted.
Arriving at Muir Woods National Monument
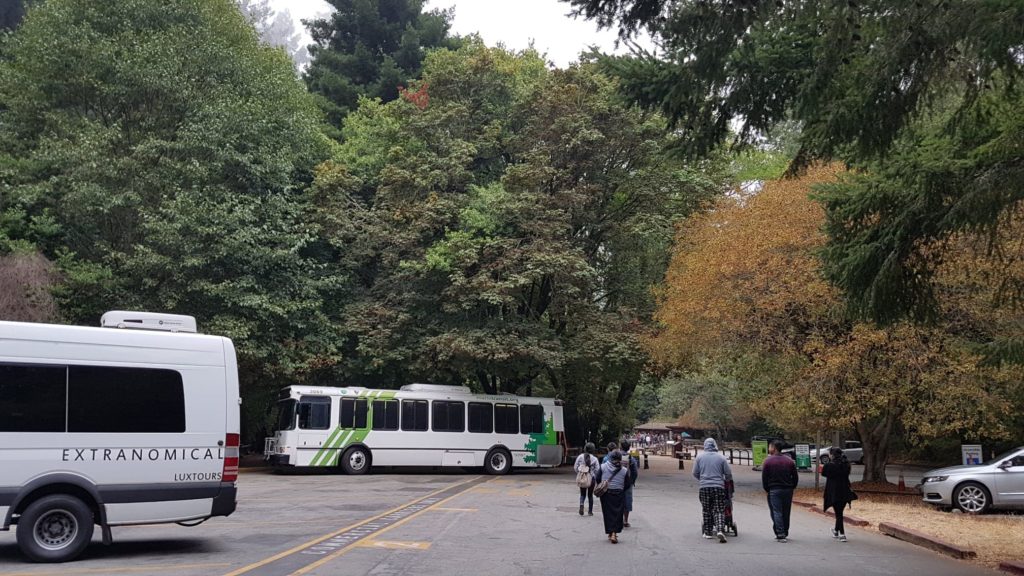
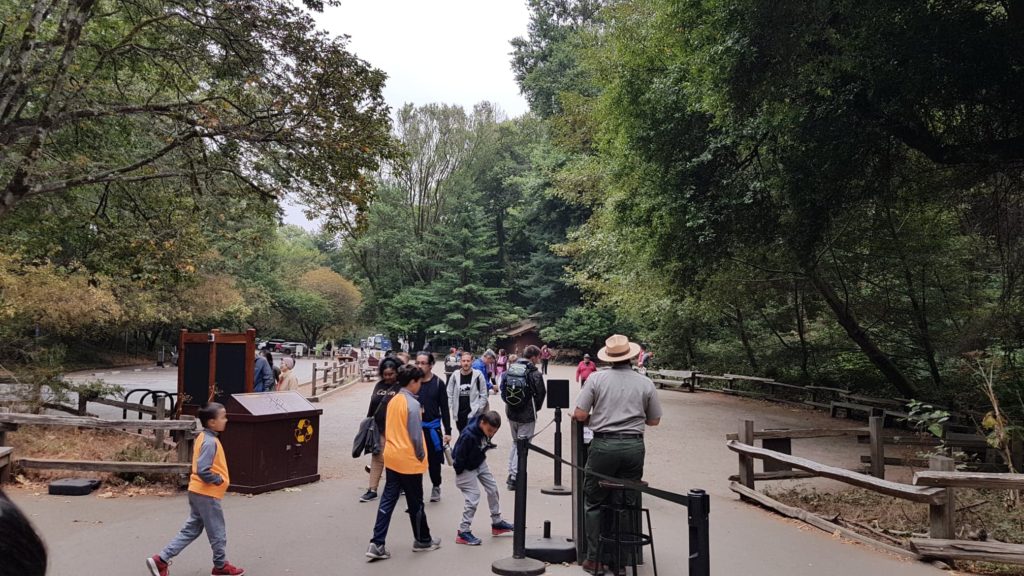
We were very fortunate to book our parking reservation in advance, we parked few distance away from the entrance gate of the park. There were number of tourists in the parking who were also busy preparing themselves for the hike, some are couples, group of teenagers, families and kids even grannies were there too. There were shuttle buses also parked near the main entrance of the park.
We headed to the entrance gate just to see if they have a picnic area where we could take our breakfast first before the walk and hike. Unfortunately, the park doesn’t have a decent picnic area, only few wooden tables and benches in the open walkway.
Food is not allowed in the park proper and we were not comfortable to set all our packed food to the tables in the open walkway so we decided to get back in the parking and eat in the van instead. It was not really convenient and not allowed but we had a great time eating our breakfast together.
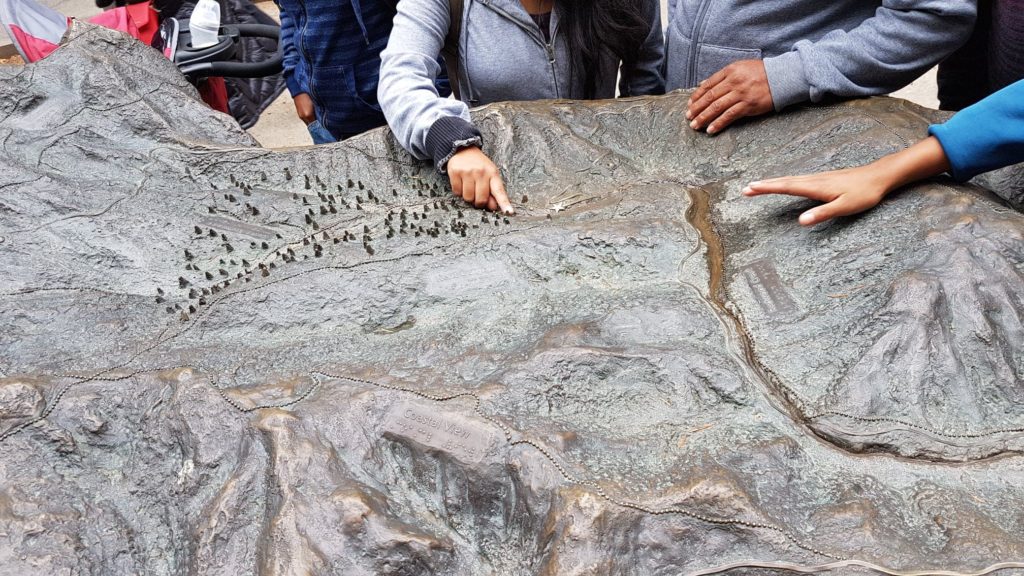
After the lovely breakfast we headed back to the park and pay the entrance fee in the visitor’s center which happened to be a souvenir shop as well. There was also a 3D model map of entire Muir Redwood Forest that can be found in the middle of the open walkway going to the visitor’s center.
Admission fees: $10 for adults 15 yrs.old and older, while younger than 15 is free.
Muir Woods Redwood Forest (The Park Proper)
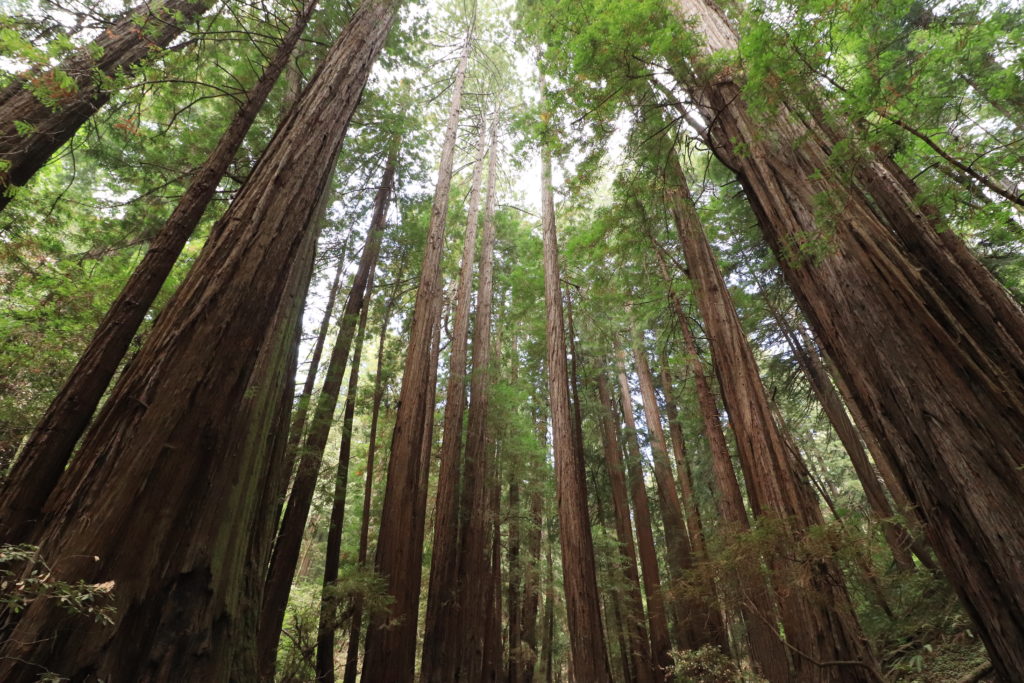
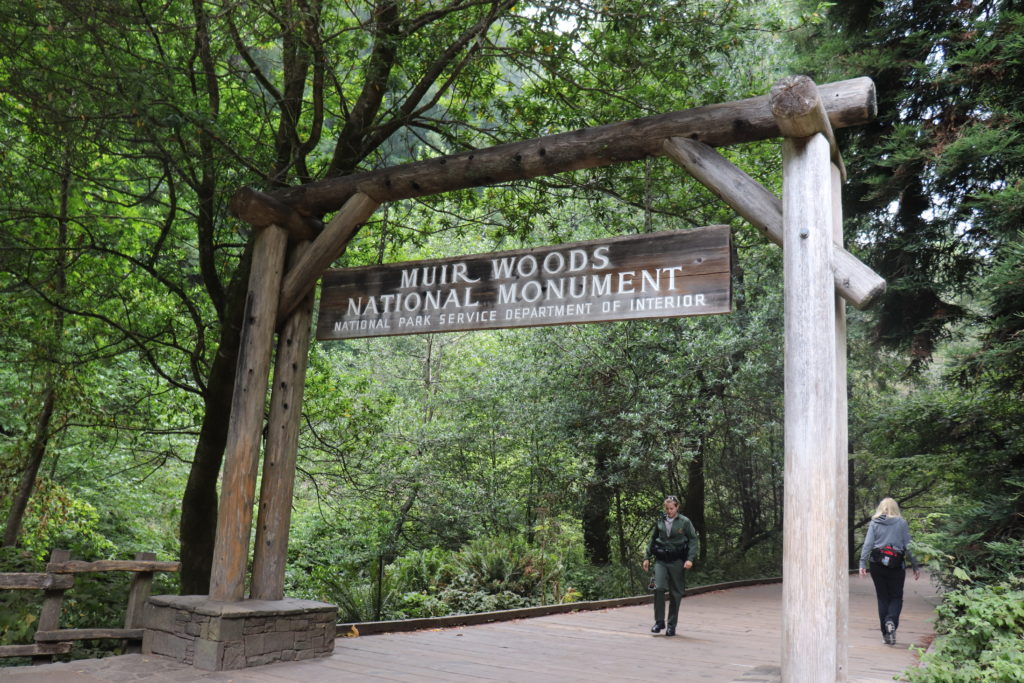
The ancient giants of Muir welcomed us as we walked through the gate of Muir Woods National Monument. Redwood trees stood tall and huge in the atmosphere of Muir. The scenery was so lovely and perfect, it was serene and peaceful. Here at Muir Woods, nature never really failed to amaze me with its unique and endless beauty! As an immigrant in U.S, it was my first time to see redwood trees, I was stunned of how these giants grew enormously big and how they survived over a hundreds to thousand years!
There was a long paved wooden trail, boardwalks for visitors to walk through. There were a lot of people yet it was not crowded. We stopped by to some spots where a ranger talked about the forest and shares facts about redwood trees. It was fun and informative that even our baby who was seated in her stroller smiled and clapped her hands as everybody clapped after the talk. Walking through the wooden trail was smooth and easy, it was stroller friendly too. But when we’re about to take a slope and took a hike into the woods, our baby needed to be in the carrier or be carried by one of us. It was not advisable to bring the stroller to that area because it was a rough road but we managed and it was not that bad.
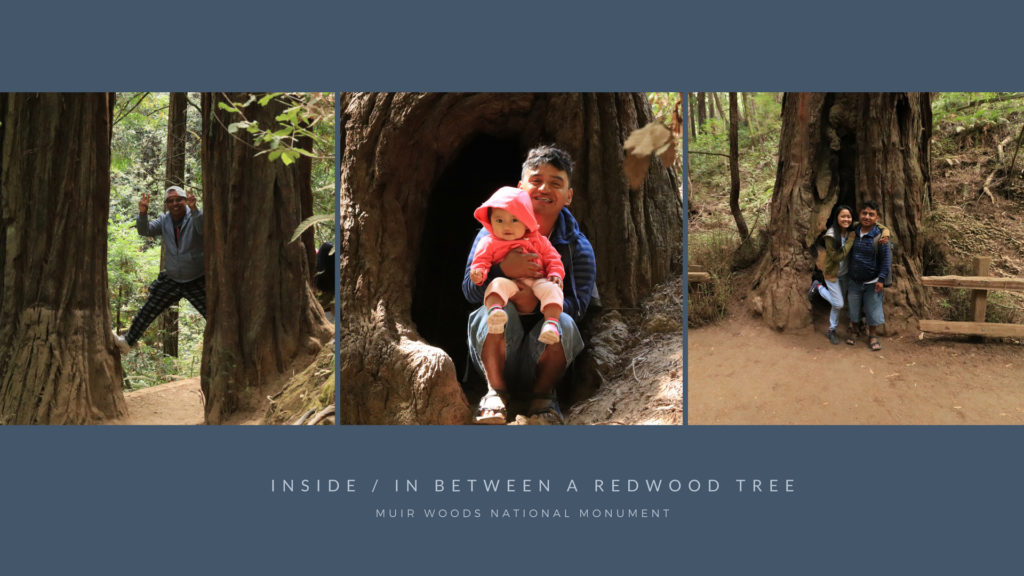
Redwood trees stood like the tallest guards of the forest. Its body was big and the bark which is the skin of this tree was thick and solid. The trunk of redwood trees grew so tall which makes the branches and stems be hidden all the way up in the fog. There were also some fallen trees and some trees that has burned black marks in its bark. Some trees has big holes in the middle of its trunk like big doors where you can pass to the other side or take pictures as if you’re inside the tree.
Some has big burls which at first we thought were bee hives or something made by insects and some has green algae in its bark.
We’ve seen small bridges (4 in total) that crosses to the other side of the loop, this is the way if you want to take a little adventure, a route for hiking. Muir has three trail options which are easily accessible from the main trail and these are the half mile, one mile and two mile loop. It all depends on your stamina how far you can hike.
BEST TIME TO VISIT
Plan ahead and travel early in the morning. The earlier you get there, the better! Better chance to enjoy the serenity of nature early in the morning and get the most out of your adventure! Less people and more time!
WHAT TO WEAR
In the morning, its still foggy so a little bit cold, its best to wear sweater’s or jackets, wear comfy rubber shoes and pants for the hike!
WHAT TO BRING
Its helpful to bring some food and drinks with you in the car in case you get hungry but be reminded that food is not allowed in the park. You can eat in the car before venturing out to the woods or after the whole day of hiking or get some snacks to the small cafe they have in the park!
If you can also download ahead of your visit the Booklet about Muir Wood National Monument, it would be a plus. You will learn all facts about redwood tress and the environment ahead of time or you can get a copy of it in the visitor’s center if you’re already in the park.
When traveling with babies or infant, stroller and carrier is a MUST!
FOR THE MEMORIES
Aside from the bunch of photographs you will surely take inside the park, don’t forget to stop by the souvenir shop/ gift shop, there are lots of wood carved souvenirs or shirts with redwood tree prints!
Finally our Airbnb tiny house is ready to welcome you as our guest! We are new Airbnb hosts and we are very excited to meet people from all over the country, even from different parts of the world!
If you’re up for some adventures in the East Bay California, we have the most convenient location for you! Only distance away from the most visited spots in the East Bay such as Six Flags Discovery Kingdom and Six Flags Hurricane Harbor/ Water World.
Napa Valley- 30 minutes away from the wine country if you’re up to wine tasting; and Vallejo Ferry Station- where you can take an hour ferry ride going to San Francisco and walking distance to the bus stops for stores, coffee shop, gas station,and freeways connecting to all major highways in South Bay.
It is a newly constructed charm located in a very quiet neighborhood in Benicia Rd. Vallejo, a perfect hideaway from the hustle and noise of the city, a perfect location for relaxation.
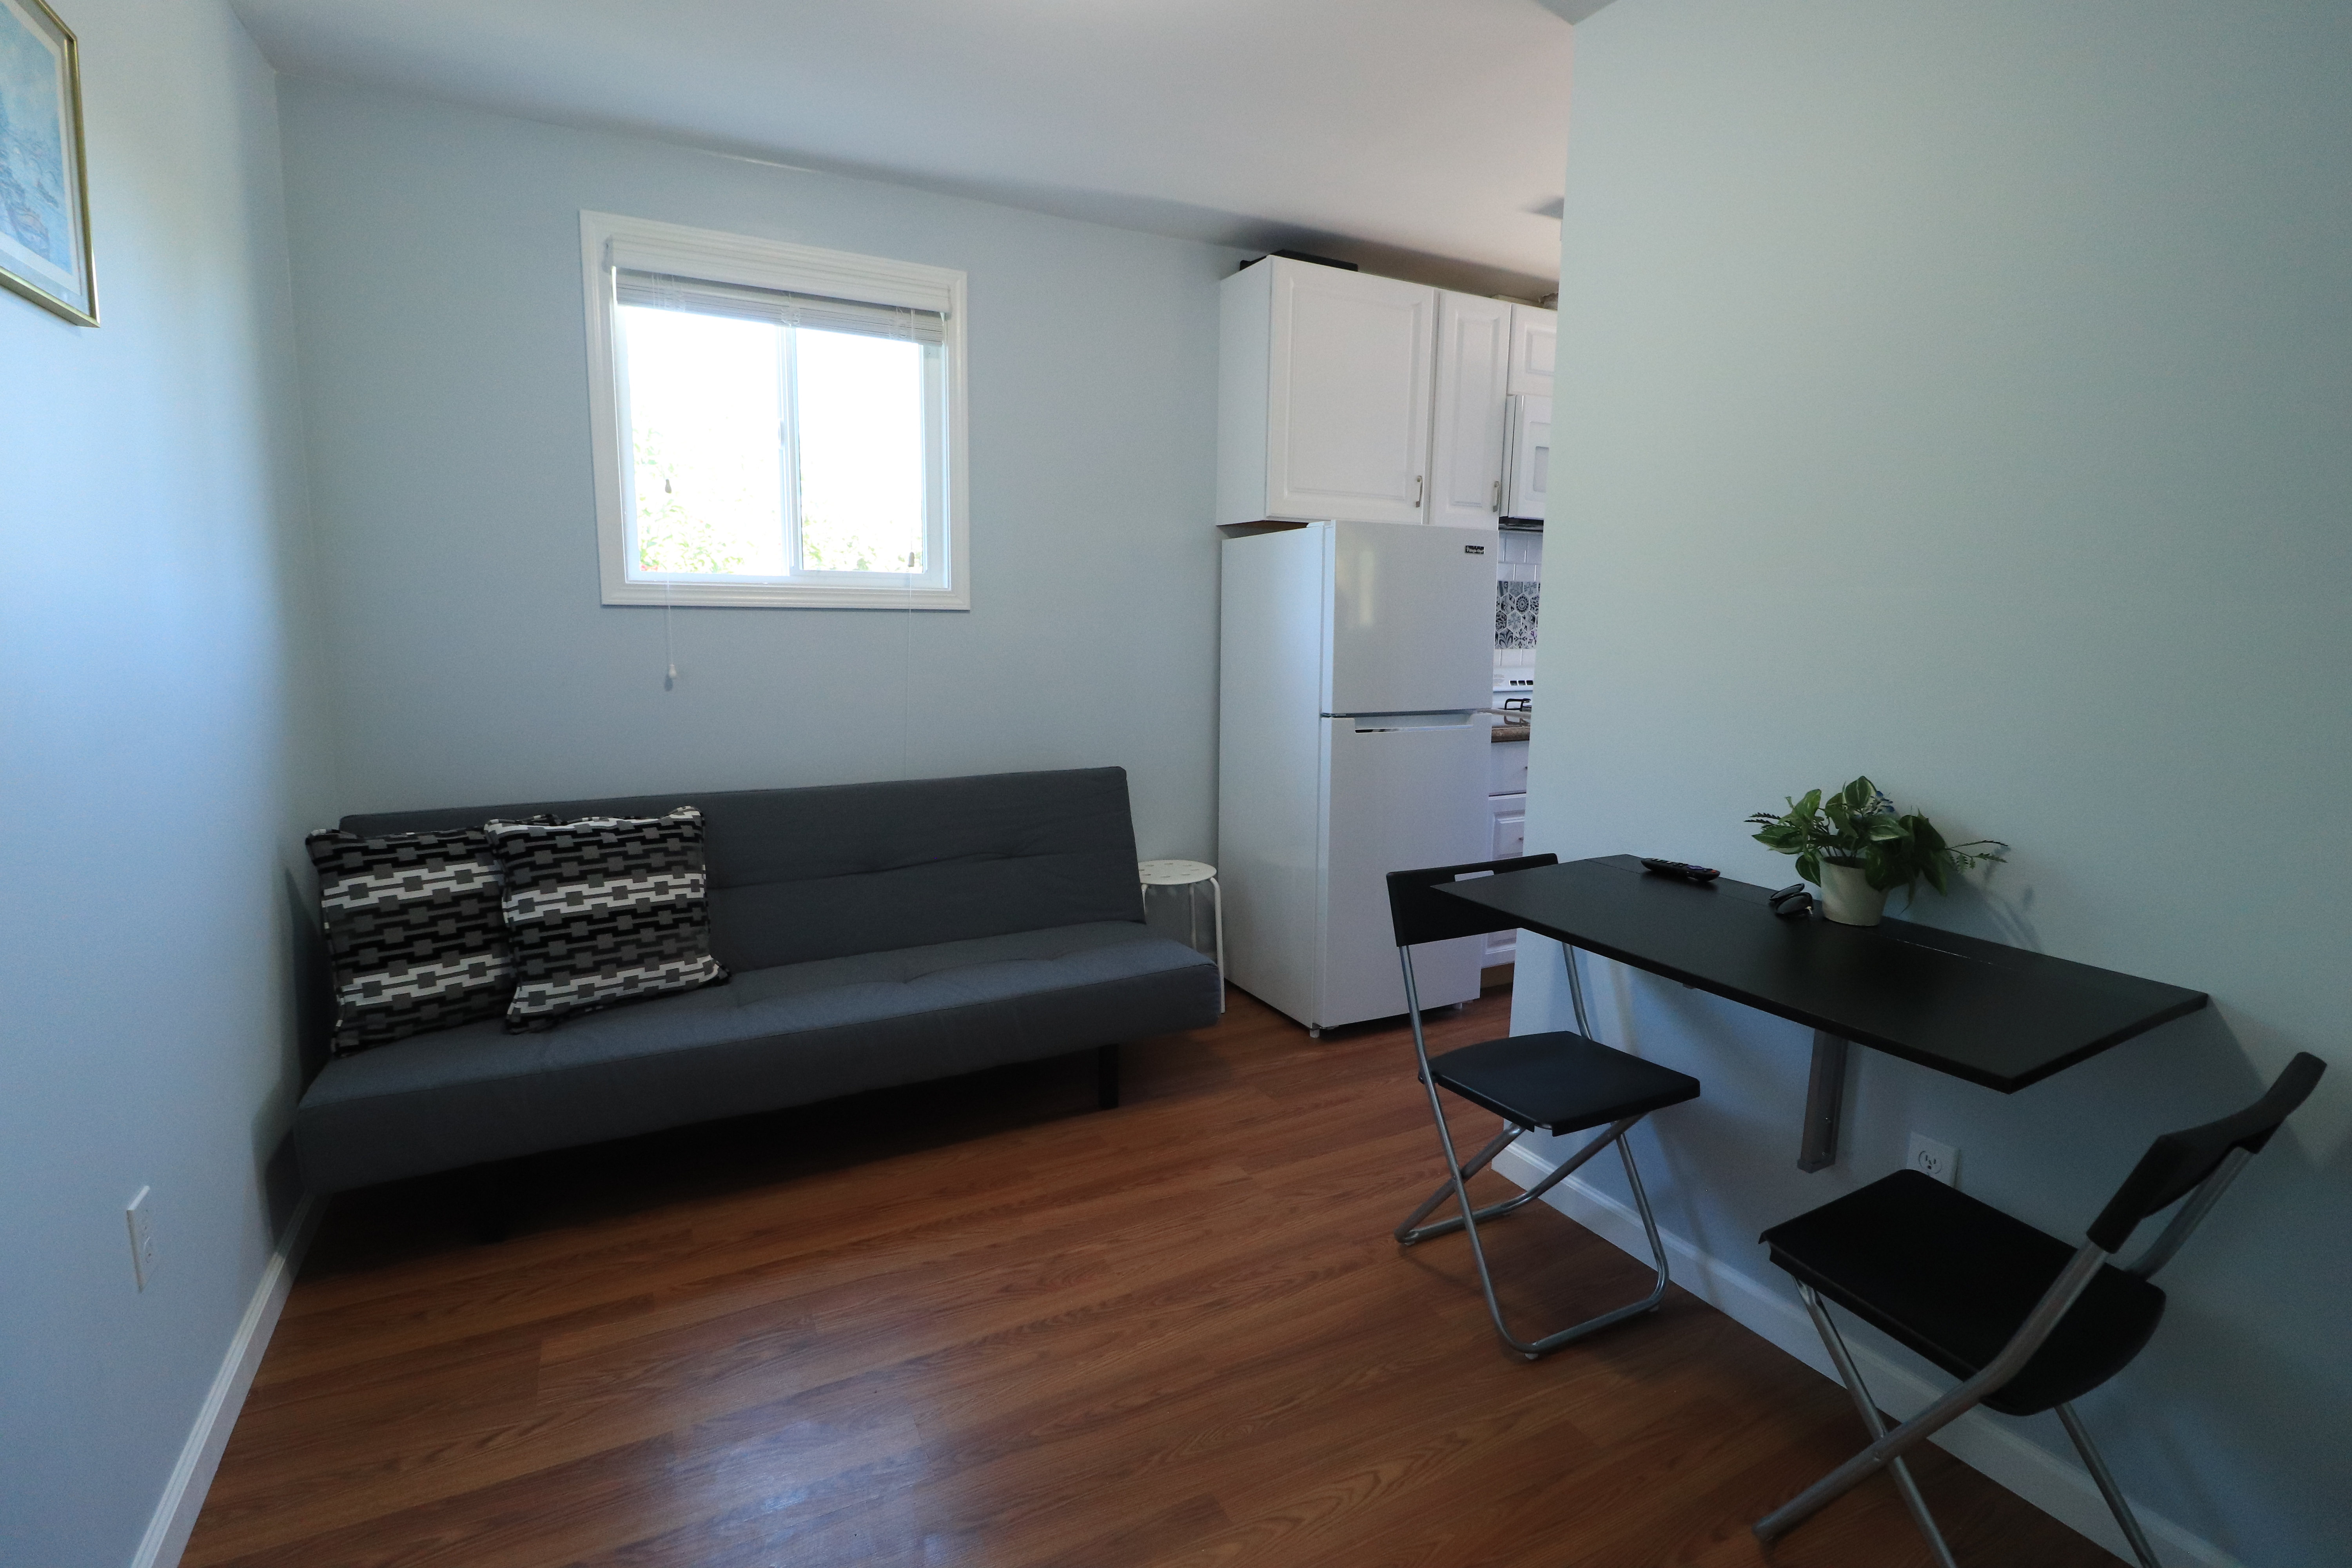
THE SPACE
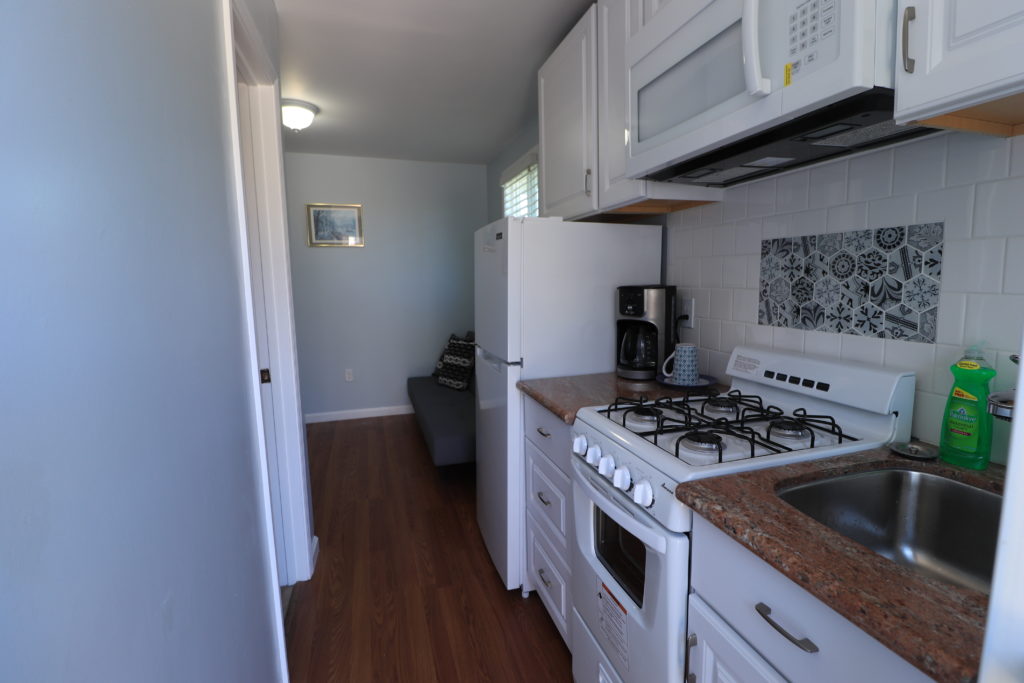
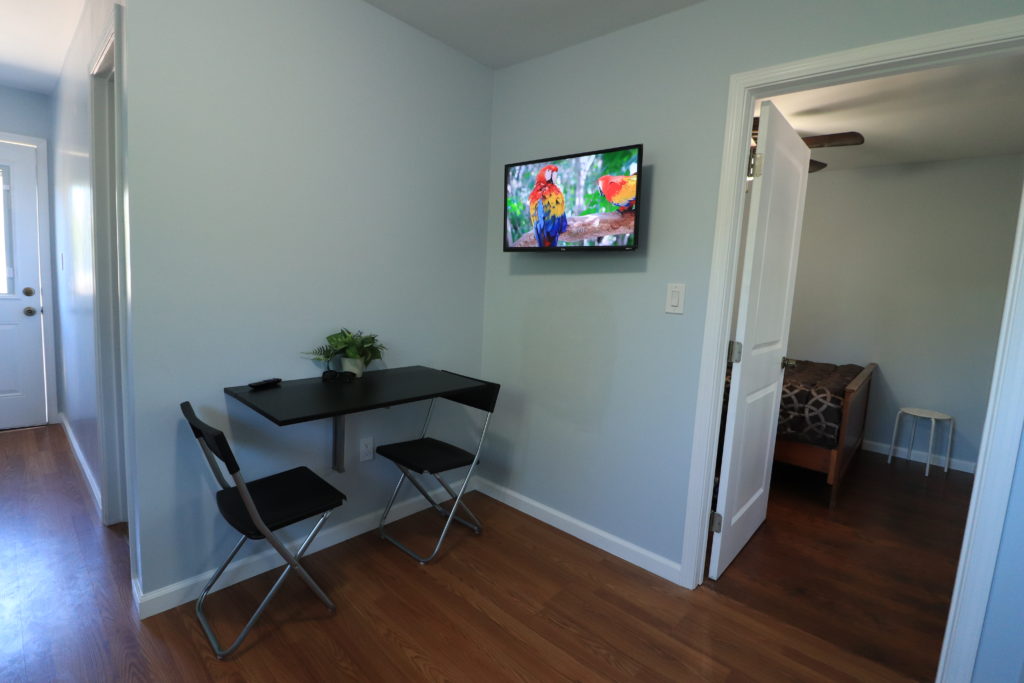
Mia’s Tiny House is a cute cozy home with a very clean areas and a quiet relaxing atmosphere. It is a private extension of the house, a newly constructed tiny home that has its own porch or deck, own private entrance/gate, parking space and features an all new amenities such as dining table/ working desk, tv, wifi, kitchenette: gas stove, refrigerator, microwave, coffee maker and some kitchenwares.
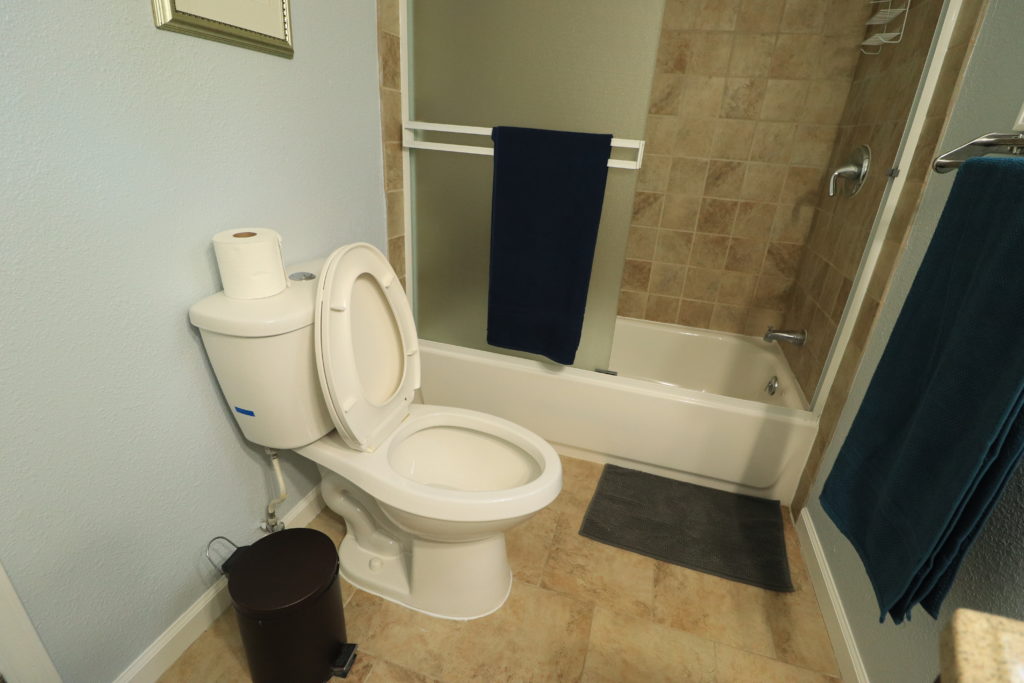
It also features one bedroom with one queen bed, ceiling fan and a functional medium sized closet with hangers already available. It has spacious dining area/ living room with a sofa bed that can sleep an additional guest, has good lighting and equipped with new t.v and most importantly a fast speed wifi. Also has one bathroom with bathtub and shower, bath essentials such as towels, hand soap and toilet paper are provided.
Upon entering the main door is the kitchen: All new in white amenities.
Dining/ Living Room Space: Sofa Bed, Dining/ Working Desk with 2 chairs.
Living Room Amenities: Roku TV & Fast Wifi.
One Bathroom: Bathroom Vanities: Hand Soap, Toilet Paper & Towels
Bathroom Amenities: Bath Tub & Shower
Full Bathroom
One Bedroom with one queen bed & medium sized closet.
Bedroom has 1 ceiling fan
GUEST ACCESS
Self-check in is available & confirm check in time with the host. You will be staying in a private space on the side extension of the house that includes exclusive private gate and private porch or deck. Backyard will be shared with the other tenants living on the other house. Everything inside Mia’s Tiny House is an exclusive private access for the guest. Parking space is available and will be assigned by us and on street free parking or driveway is also allowed.
INTERACTION WITH GUEST
We welcome guests upon arrival and we give a short tour of the house, short briefing on Wi-Fi /internet, TV guide and provide the key of your new place to stay. You are in a completely separate private area so you can enjoy your privacy. But we are very willing to interact in case you need someone to talk to or if you have any inquiries or concerns. We can easily be reached through airbnb app, messages and phone calls.
Discover and explore what East Bay of California has to offer and you are welcome to be our guest in Mia’s Tiny House located in Benicia Rd. Vallejo. For bookings and reservation please visit airbnb.


 The railway system of Japan is so advanced yet complicated. We all installed JapanTravel, an application downloadable for free in the App Store that would help us identify the best route for a specific destination.