Blog

  • Homemade Oreo Vanilla Marshmallow Ice Cream

    Homemade Oreo Vanilla Marshmallow Ice Cream

    Homemade Ice Cream

    Craving for an ice cream? Why not make your own at home! It’s cheap, it saves your time, and most especially its fun to make it with the whole family! With just very few ingredients and very easy steps we have made a superb ice cream tasting the crunch of oreo cookies with the blend of cream and soft mallows! This Oreo Vanilla Marshmallow Ice Cream recipe would only require you 5 ingredients and does only need few easy preparations!

    Ingredients:

    2 tsp Vanilla

    2 cups Heavy Whip Cream

    14 oz Condensed Milk

    2-3 cups Crushed Oreos (desired amount)

    2 cups Marshmallows (desired amount)

    Preparation & Instructions:

     With an electrical mixer, beat the heavy whip cream for about 2-4 minutes or until soft stiff peaks formed. Add and stir in the condensed milk and the vanilla, mix or stir evenly into the whipped cream. When mixed, add 2 cups of crushed oreos and marshmallows and using a spatula mix to combine all into the mixture. Cover the container and freeze overnight or you can transfer it to a freezer safe ice cream container if desired. Once frozen, scoop into a glass or ice cream cups and it’s ready to be serve. Enjoy!

  • Mango Pineapple Smoothie

    Mango Pineapple Smoothie

    Ingredients

    1 Mango, peeled,seeded & diced

    1 large Banana, peeled & sliced

    1 cup Pineapple chunks (with 100% fruit juice)

    3/4 cup low fat Vanilla Yogurt

    1 cup Ice cubes

    1/2 cup Fresh Milk

    Sugar for tasting ( exclude if necessary)

    Strawberry for topping (or any fruit you desire)

    Preparation

    Combine all ingredients except strawberry in a blender container.

    Blend until mixture is smooth .

    Transfer by pouring mixture into glasses then top with sliced strawberry. (or any fruit you desire)

    Serve, enjoy and be refreshed!

    Preparation Time: 7 minutes

    Serving: 2-3 

  • Moist Chocolate Chip Muffin

    Moist Chocolate Chip Muffin

    Ingredients

    1 ½ sticks of unsalted butter (if you decide to go with salted you can go ahead and exclude the ¼ salt)
    1 cup of sugar
    2 cups chocolate chip
    2 whole eggs
    2 egg yolks
    1 ¼ cups milk
    1 ¼ cups sour cream
    2 teaspoon vanilla extract
    2 ½ teaspoon baking powder
    ¼ teaspoon salt
    2 ½ cups flour

    Preheat your oven to 375 F.

    Place melted butter in a large bowl then add sugar and mix well with a beater or mixer until ingredients are combined and smooth. Add 2 eggs, subsequently adding 2 yolks. Mix that together. From there you can start adding vanilla, baking powder, salt and pour in the milk. Beat until the butter thickens, next add in sour cream and beater at medium speed. Make sure it doesn’t come out too dry but if it does you can add a little bit of milk until butter looks just right. Pour in chocolate chips and with a wooden spoon or spatula carefully mix it in. For the next step you can either use an ice cream scooper to scoop in the mixture into the muffin baking cups or if you don’t have a scooper you can use two spoons. Scoop out a spoonful of butter with one spoon and with the other you can scrape it off the spoon into the muffing baking cups. By now your oven should be ready, place the muffins in the oven and bake for 30 to 35 minutes or until they are golden brown. Let them cool for a few minutes.

    You can always make them ahead of time and store them in a dry container. They won’t dry because the sour cream keeps them moist.

    These muffins are perfect with a fresh morning coffee or a cup of cold milk. Enjoy!


  • Pasta Bolognese Quick and Easy Recipe

    Pasta Bolognese Quick and Easy Recipe

    [video_embed url=”https://www.youtube.com/watch?v=g3SRqN_6f_M” embed_style=”default”]

    [separator type=”default”]

    INGREDIENTS:

    • 2 tbsp. Olive Oil
    • 5 tbsp. Tomato Paste
    • 3 cups Whole Fresh Milk
    • 1 tsp. Oregano
    • 1 1/2 tsp. Salt
    • 2 tbsp. Heavy Cream
    • 2 tbsp. Unsalted Butter
    • Shredded Cheese for serving
    • 1 lb. Ground Beef
    • 1 lb. Penne Pasta
    • 1 medium Onion
    • 4 cloves Garlic
    • 7 baby Carrots

    SAUCE PREPARATION AND INSTRUCTIONS

    Start by chopping spices including garlic, onion and carrots into small finely chops then set aside. Heat the oil in a pan over medium-high heat and saute chopped garlic, onion and carrots for about 3-4 minutes or until it begins to soften. Add the ground beef and cook, stir often until meat begins to brown. Pour in the tomato paste, stir and mix well then add whole fresh milk, oregano and salt. Stir, let it simmer in a reduce low heat and cook with often stirring until sauce becomes thick. Then add and stir in the heavy cream and butter. Add some salt if necessary for tasting. Remove from heat and set aside.

    PASTA PREPARATION AND INSTRUCTIONS

    Boil a pot of water with 1 and a half salt. Pour in the penne pasta, cook until ready and drain.

    PLATING

    Serve pasta into a plate, top with the sauce and desired amount of shredded cheese. Enjoy!

    NOTES: For more complex and artful taste you may add the taste of wine into your sauce about 1 and a half cup.

    Preparation & Cooking Time: 30 minutes

    Servings: Approx. 5

  • Ang Pagsasalaysay ng Isang Landas

    Ako’y tila isang guryon na waring sumasayaw sa musika ng hangin
    Hanging hindi ko mabatid ang lakas at bagsik
    Kaagapay ang dalangin at paniniwala sa tibay ng natatanging tali
    Ako’y wag hayaang mapadpad sa kawalan ng langit

    Kasabay ng aking pagsayaw sa indayog ng musika
    Kasabay ng bawat galaw at hakbang na hindi maalintana
    Isang matibay na paniniwala sa daang may buhay at saya
    Isang mithiin ng magpakailanman na umusbong noong simula

    Sa malawak na karagatan ng langit na puno ng iba’t ibang kulay
    Aking pilit na tinatanaw ang nais masulyapan
    Ang posibilidad dala ng bukas hanggang dulo at sukdulan
    Puro at tunay na kasiyahang magbibigay ganap sa’king buhay

    Sa aking paglipad at pagtahak sa landas na hindi inakala
    Maraming naiwan ngunit kailanma’y hindi makakalimutan
    Sa isip at puso ko’y natatangi at patuloy na inaalala
    Mga salaysay ng buhay na nagsilbing isang kayamanan

    Hindi pa man matanaw ang bukas na dala ng bawat umaga
    Hindi man nakakasiguro sa araw na darating
    Sa bawat dalangin ko’y natatangi ang lakas at bagong pag-asa
    Gabay, kaligtasan at walang pasubaling pag-ibig

    Isasalaysay sapamamagitan ng pagsulat ng mga salita at pangugusap
    Sariling pagbibigay kahulugan sa sariling kataga
    Walang pagtatakip ng pagkakamali at pagkukubli ng hirap
    Walang pagkukunwari ng katotohanan at saya

    Responsibilidad ang paglipad sa isang malawak na hardin
    Hardin na maaring dulot ay karimlan o langit
    Ang kalayaang maisulat at mailahad ang nais sabihin
    At maipabatid ang kakayahang maglarawan at gumuhit

    Maihahambing man sa isang guryon o sa isang ibong mandirigma
    Ako’y patuloy na maglalakbay sa tayog ng alapaap
    Sa langit ng bahaghari at makakapal na ulap
    Kaakibat ang lakas ng loob, mga dalangin at mga paniniwala

    Sariling aklat mula sa unang pahina, ito ang aking simula at ako ang tanging may akda


  • My U.S Tourist Visa Application Experience

    My U.S Tourist Visa Application Experience

    Being in a relationship with someone who’s oceans and continents away from you is a very tough love fairytale. The everyday struggle of being apart is not easy through modern technology, we tried to filled up our longingness with unlimited conversations but it wasn’t the same as being together. From the Philippines to the United States, our desire to be with each other in the same place made us look for possibilities to make our dream come to reality. Due to certain reasons, my boyfriend (back then) could not find opportunity to visit me in my country so we planned to apply for my tourist visa and visit him with his family in California.

    What I am about to share with you is based on my own experience therefore information may NOT be current. My purpose of sharing it, is to ONLY give you ideas to familiarize yourself with the process. In here you will find my own personal opinions and suggestions that you may use at your OWN risk. I recommend you to visit USCIS official website to get more specific and accurate information about the process.

    U.S Tourist Visa Application (MY 1st Application: July 2016)

    The first Step Process

      1.        I visited the U.S Visa Information Service for the Philippines on their U.S embassy website to know more about U.S visas and the requirements on how to apply for each. My application for  tourist visa falls on nonimmigrant visa type which is also used for business, student, worker and people who would like to stay only for a specific period of time to accomplish their purposes. You can read all the information you need on their website and all the steps were enumerated clearly so you have the proper guidance on what to do next.

      2.      First step would be determining what type of visa you are applying to and know the corresponding application fee for that specific visa type. A visa type B with the fee of $160 is for business or tourist application and the equivalent in Philippine peso will depend on how much is the current exchange rate per dollar, bear in mind that payments were paid in local currency. (Please check the embassy’s website for the updated fees)


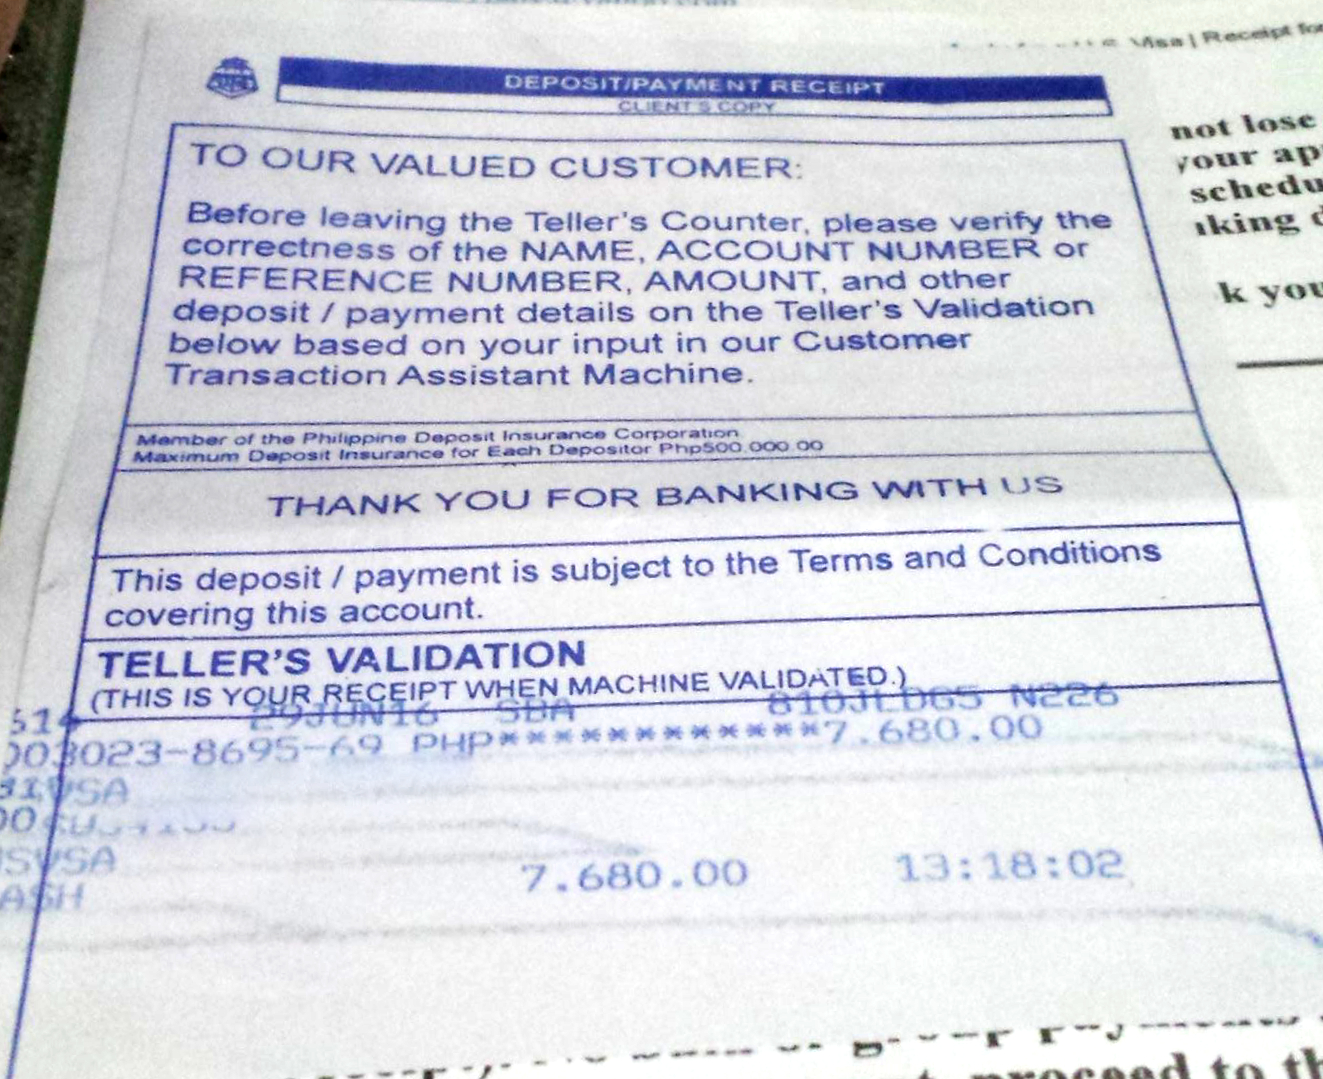
    After knowing the visa type and application fee for my tourist visa application I then downloaded and printed the deposit slip for $160 fee(downloadable from their website) as a requirement before going to the bank BPI (Bank of the Philippine Islands), the only bank where you can pay for any U.S visa application. With the printed deposit slip and the peso cash that was equivalent to $160 I went to BPI and pay the application fee. Instructions can be read in your printed deposit slip on how to make the payment when you are already in the bank.

    After payment, I received my receipt and kept it as part of my records. I advise you to not lose the receipt because the bank would not issue a copy of your receipt. The bank receipt’s number is also a requirement when scheduling an appointment for the visa interview (online or via phone). Before thinking about getting an appointment schedule for your interview you first need to fill-up completely the required form DS-160 for your application. Follow the guidelines on the embassy’s website and read all the important instructions to complete that form. After I completed and submitted the form DS-160 with the required photo online-  I was now ready to schedule an appointment for my interview. Make sure to submit your completed DS-160 form and have a printed copy of your confirmation page that comes with a barcode because this form will be asked by the consulate officer on the day your interview.

    3.      I made sure to check all my documents including my passport, payment receipt from the bank, DS-160 confirmation page and my email before scheduling an appointment for interview. I suggest you to have all these documents and information ready with you when you call or go online to get an interview appointment.

    After checking all these supporting documents, I called to the U.S embassy call center services to schedule an appointment for my interview. Scheduling an appointment can also be done online using the U.S consulate’s website. I preferred to call through the embassy’s call center service because online scheduling is a bit of extra work to do. I mean the process requires me to first register then create my profile online before I can log.in and be able to access the steps of how to set an appointment schedule. For my convenience I called to the embassy and ask kindly to the agent to schedule me an appointment and provide the agent all the required document information.

    My interview appointment was scheduled on the 18th of July 2016 which was only a few weeks after I submitted my application online. Some people claim to wait a month or so to get an appointment, but I guess it depends on your luck. After you scheduled an appointment make sure to read all the requirements you need to bring during the day of the interview as well as important reminders about the things that are or not allowed inside the embassy or consulate and some tips on what to wear.

    Wearing formal attire would be the usual wear during interviews but I preferred to wear a casual wear . What matter would be the interview and how you carry yourself confidently with your honest answers that will assure them of your real purpose and give them strong assurance that you will go back to your country after your intended period of stay in the U.S. Aside from the requirements I mentioned above, four 2×2 passport pictures were also required on the day of the interview.

    4.       Interview day came and I went to the embassy/consulate 30 minutes before my scheduled time with all the required documents with me. The area for the applicants is near to the bay to fall in line to their scheduled time posted on posts specified to different visa type application. U.S consulate staff changes the time posted every 15 minutes so be alert to watch out for your scheduled time.

    I was scheduled at 10:15 a.m so when the staff changed the time posted from 10:00 to 10:15, I and other applicants who were also scheduled at the same time started to form a line and were asked to proceed to the entrance for document verification. A verifier agent or officer asked for my passport, DS-160 confirmation page and the passport photos. After my documents were verified the officer posted a sticker on the back of my passport stating my name, the date and time of my scheduled interview. The officer handed back my documents then we proceeded inside the consulate and went through inspection (prohibited items like phones, headphones, charger etc. were asked to be left outside the consulate-so better be reminded NOT to bring all of those items or have someone you knew who will take care of it while you’re inside the embassy).

    After the inspection, we were asked to be seated in the open hall and waited for our batch to be called to proceed for biometrics or finger scanning. We were then called and went inside the interview hall, was asked to applied hand sanitizer prior to finger scanning, got the biometrics done and proceeded to take a seat and waited our own turn for the consul’s one on one interview. While waiting for my turn to come, I was observing other applicants who were in the interview, as the time went by I started to feel very nervous and thought if all the questions that officers ask others would be the same as mine.

    I witnessed approved and denied interviews of applicants with different purposes ahead of me and when my turn came for my one on one interview I ended up with an American lady consul. She asked for my documents including my passport, asked me to confirm all my information, encode it to the computer and asked me about my purpose of application. She asked about my boyfriend’s information, what he does for a living, how did we meet, how long have we been into the relationship, how long do I intend to stay in U.S, and asked about my current work and how much I earn a month. I made sure to answer all the questions honestly but I ended up receiving a blue form stating that I have been denied or my application was rejected. The consul also informed me that I am not qualified to have a tourist visa and the form states why.

    I have learned from my experience that in-order to be approved for a visa the consul must be assured enough of your purpose and the particular period of time you intend to stay in U.S without finding any possibility of over staying in the country or you may have redoubtable reasons of returning back to your country after you accomplish your purpose in U.S. Such reasons would include children that you’ll be leaving at home, property, business or work within your country and you earn a high above average wage for living and all valid strong evidence that will make you go back and that you don’t have any hidden plans to over stay in U.S for any purpose it might be. It is best to answer each question with simple and precise answers but make sure to secure your reasons with powerful evidence that will give them strong assurance of your return and this will give you greater chance to be approved with a tourist visa.

    The consuls are very detailed with their questions and they know so well how to evaluate each of your answers so being truthful and honest is the best way to go and they will start to analyze you situation and will determine or foresight possibilities of what you can or may do when you are already in U.S. I would say being rejected never means of giving up because there are more ways and opportunities ahead of me and I told myself that there will always be next time and when that time comes it will be the right time for me.

  • California: My First Months in My New Home

    California: My First Months in My New Home

    First Life Experience in California

    Emerville

    My life has been kind of ironic in a way because I never thought that one day I would call San Francisco Bay Area my home, I swear I never thought of it. Life gives us a lot of surprises. Now here I am telling you my story of my arrival to the United States. San Francisco International Airport was my final destination. Before my arrival especially when I was still in my native country the Philippines, I have always pictured the U.S as a perfect country, a very modern, sophisticated and wild one to live in. Tall buildings, big roads, no poverty only wealth, beautiful cities with lots of people of different races.


    Well… some of my envisions and imaginative thoughts were right, the U.S did not really disappoint me, for a person who has never been in the U.S such as me, I was more like impressed to see all the things that the U.S was made of. Maybe watching a lot of movies influenced my way of thinking and maybe that was what made me imagine such a perfect country that was far from reality. Though, not everything turned out to be how I expected I was exhilarated and eager to welcome this new change to my life. One of the most unexpected changes that I encountered was the weather because it is far different from The Philippines’. With four seasons, spring, summer, fall and winter. Adapting to these seasons was quite hard especially the winter season which is when the temperature gets very low. The cold was unbearable, though I tried my best not to shiver so that I don’t make it look obvious for other people to see that I was cold but It was hard, I couldn’t fake it and I had to wear a thick jacket all the time. Good thing it was almost the end of winter when I got here so I didn’t really suffer that much. It might not seem like a big deal but for me it was a major issue that I had to deal with because I was used to only two weathers which are the wet season and dry season.


    I know this is just the beginning, so I try to take things easy because there are still lots of things to discover. as time goes by I will continue adding those upcoming events in my life. so stay tune!

  • Training your imagination

    Training your imagination

    American Apparel yr vegan, semiotics synth kogi salvia cold-pressed squid cliche bicycle rights beard small batch. Cronut pork belly forage, fixie trust fund paleo cray pop-up hashtag synth fashion axe aesthetic Pinterest tote bag. Pop-up fingerstache crucifix yr pork belly, Bushwick fanny pack distillery fixie slow-carb cray. Art party stumptown keffiyeh 90’s next level crucifix. Umami ugh tilde, swag listicle hoodie banh mi small batch sartorial lo-fi locavore cold-pressed. Bushwick Carles next level health goth, fap gentrify Truffaut ethical mumblecore put a bird on it pickled. Gastropub plaid Pinterest small batch.

    Literally paleo keffiyeh Pitchfork banjo post-ironic freegan Odd Future blog cardigan. Narwhal aesthetic vegan, chia ennui blog raw denim semiotics sartorial cornhole art party Blue Bottle fingerstache try-hard. Heirloom drinking vinegar fixie chia tofu art party authentic. Intelligentsia listicle tilde brunch ennui leggings pour-over 8-bit whatever, +1 Neutra. Viral raw denim Williamsburg typewriter, cardigan retro four dollar toast mustache heirloom disrupt. Crucifix polaroid beard gastropub, authentic keytar street art fashion axe seitan Neutra tofu hella swag literally four loko. Kickstarter Odd Future paleo ethical.

    Vice sartorial cronut lumbersexual disrupt bespoke Godard PBR. Lomo +1 Thundercats raw denim. Seitan hoodie craft beer, brunch actually chambray distillery Echo Park McSweeney’s mlkshk tilde.

Share via
Copy link
Powered by Social Snap