Category: Immigration

  • How to Apply Removal of Conditions on Permanent Residency

    How to Apply Removal of Conditions on Permanent Residency

    FORM I-751: PETITION TO REMOVE CONDITIONS ON RESIDENCY

    After being a lawful permanent resident for 2 years and 90 days before your 2 yr. Green card expires, K1 immigrants should apply for removal of condition on permanent residency or removal of conditional status in USCIS.

    “You must file a petition to remove conditions on permanent resident status, or risk losing your lawful status.”

    FILING FEE: $680

    Form Fee: $595 + Biometric Fee: $85 = TOTAL of $680

    Now how do you know if you are eligible for filing this application?

    ELIGIBILITY:

    • Permanent resident for 2 yrs. Married to the same petitioner
    • May include kids or derivatives who are filing with you
    • Child/children who have the same status as you as a conditional resident based on parent
    • Widow or widower who came in good faith of marriage
    • Married in good faith before but was divorced or annulled
    • Married in good faith before but experienced abuse and or extreme hardship with U.S citizen spouse

    Please be reminded of the following pointers when you are applying this Form I-751 Removal of Condition on Permanent Residency.

    REMINDERS:

    • File application exact day within 90 day period before your green card expires.

    File NOT too soon nor late. If you submit your application too early, USCIS will return your documents and if you file it late, you have to provide a good valid explanation of its cause before USCIS can accept it.

    • Sign all the required forms.

    No signature will result in an automatic rejection of your petition application.

    • Make sure you are filling up the updated version of the form.

    The current version of Form I-751, available on the USCIS website.

    • Pay Correct Fee.

    Signed with a correct total amount of $680 in a single check.

    • Arrange documents in order with the check or money order in the front.

    Include an Index/Cover Letter, Form G-1145-E (Request for electronic notification: optional), Form G-28 (Attorney/Accredited Rep), Form I-751 (which is the form you are filing) and lastly are the copies of the supporting documents or evidence.

    • If you have extra attachments or pages in your application forms,

    Make sure to write your NAME, A-NUMBER, and the PAGE NUMBERS.

    After knowing that you are eligible in filing this petition, you can file a Petition on Removal of Condition in 2 ways or even file a waiver depending on your case.

    WAYS OF FILING THE PETITION:

    1. JOINT PETITION – If still married to the same petitioner
    2. INDIVIDUAL – If due to Death of Petitioning Spouse and or due to Terminated Marriage
    3. WAIVER OF JOINT FILING REQUIREMENTS –  If due to abuse or extreme cruelty from U.S citizen spouse.


    With all this information in mind, you can start your application by filling up the application form which is downloadable from the official website of USCIS.

    FILLING UP THE APPLICATION FORM I-751:

    Fill up and complete the form I-751 from USCIS website which is about 11 pages long and read thoroughly the instructions given for this form.

    Submit all supporting documents and evidence (depending on your case).

    SUPPORTING DOCUMENTS IF FILING AS JOINT PETITION

    Which was what I prepared for mine when I filed my ROC application last year, October 2019.

    • Copy of your Green Card or Permanent Resident Card (front and back)
    • Copy of children’s green card (only those included in your petition)
    • Evidence of Relationship:

    > Copy of marriage certificate

    > Children’s birth certificate (child resulting from the relationship)

    > Photos together from your marriage until present date (Submit copies of as many documents as you can to prove the marriage was entered in good faith)

    • Medical insurances
    • Joint ownership: financial liabilities and financial records
    • Household bills
    • Home and Car insurances
    • Affidavit of Support
    • Tax returns
    • Joint bank accounts
    • Copy of Passport ( Biographic page & page with stamps)
    • Explanation letter why you’re filing late (If applicable)
    • If you’re a child and filing separately from the parent. (If applicable)
    • Dispositions on criminal charges or arrests (If applicable)

    SUPPORTING DOCUMENTS IF FILING AS INDIVIDUAL

    Just like what I’ve mentioned earlier, this petition is case to case basis so if you are filing ROC or Removal of Condition due to Death of Petitioning Spouse and or due to Terminated Marriage you will file as Individual.

    The required documentation is just the same as above, just with a few additional documents such as:

    • Divorce or annulment decree
    • Evidence in any circumstance showing end of relationship

    For those who have experienced abuse or extreme cruelty from their U.S citizen spouse, you can file a Waiver of Joint Filing Requirements.

    SUPPORTING DOCUMENTS FOR FILING A WAIVER

    The required documentation is just the same as above, just with a few additional documents such as:

    1. Evidence of abuse
    2. Divorce or Annulment decree terminated by grounds of physical abuse or cruelty
    3. Evidence of extreme hardship


    After you prepared all the supporting documents or the requirements needed on your case and you have signed and completed the form of I-751, include the correct filing fee (single check) and you may submit your packet to USCIS. Check the link below for the address of USCIS.

    USCIS LOCATION/ADDRESS

    MY EXPERIENCE AND TIMELINE

    USCIS Notice for ROC
    USCIS Notice for ROC

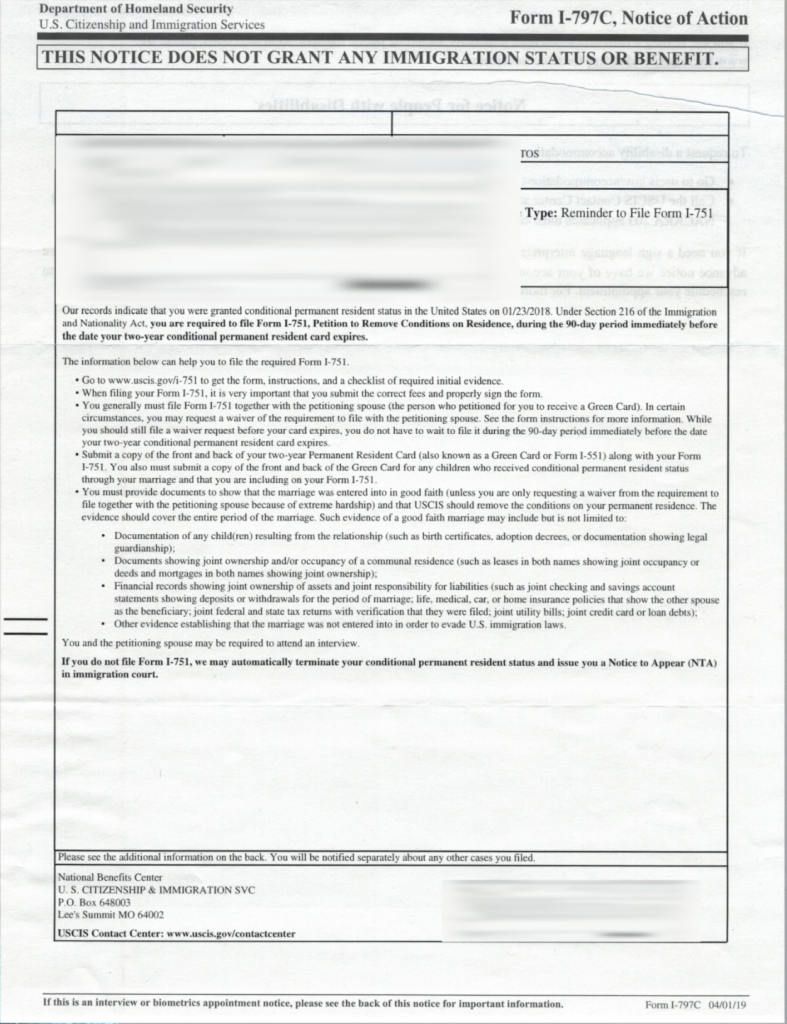
    September 25, 2019: Receipt of USCIS Reminder Notice

    About four months before my 2-year green card expires, I received a notice from USCIS reminding me to file for Petition on Removal of Condition of my permanent residency.

    The notice stated the date I was granted a conditional permanent residency and the day of its expiry.

    Also, the list of supporting documentation needed in the application form I-751.

    And at the very end of the letter, it stated that failure to file Form I-751 will result in automatic termination of my conditional permanent resident status and I might also receive a Notice to Appear in immigration court.

    OCTOBER 20,2019: Filing of Form I-751 Removal of Condition on Permanent Residency

    We filed our petition just a couple of days before the 90 days expiry of my 2 yr. Green card.

    But USCIS rejected our application since they received it earlier than the prior 90-day period preceding the expiration date of my green card.

    NOVEMBER 6,2019: Receipt of Rejection Notice

    ROC Rejection Notice
    ROC Rejection Notice

    NOVEMBER 7,2019: Re-filing of Form I-751

    This time I was so sure that it was within the 90 days prior expiration of my 2 yr. green card. I just had to print again the forms since when USCIS returned my previous application, each document has its stamp and was dated.

    It is essential to have a copy of every application that you send to USCIS so that whenever some case like this happens, it’s easier for you to just make a copy of it again.

    NOVEMBER 21,2019: Receipt of I-751 Extension Notice

    ROC Extension Notice
    ROC Extension Notice

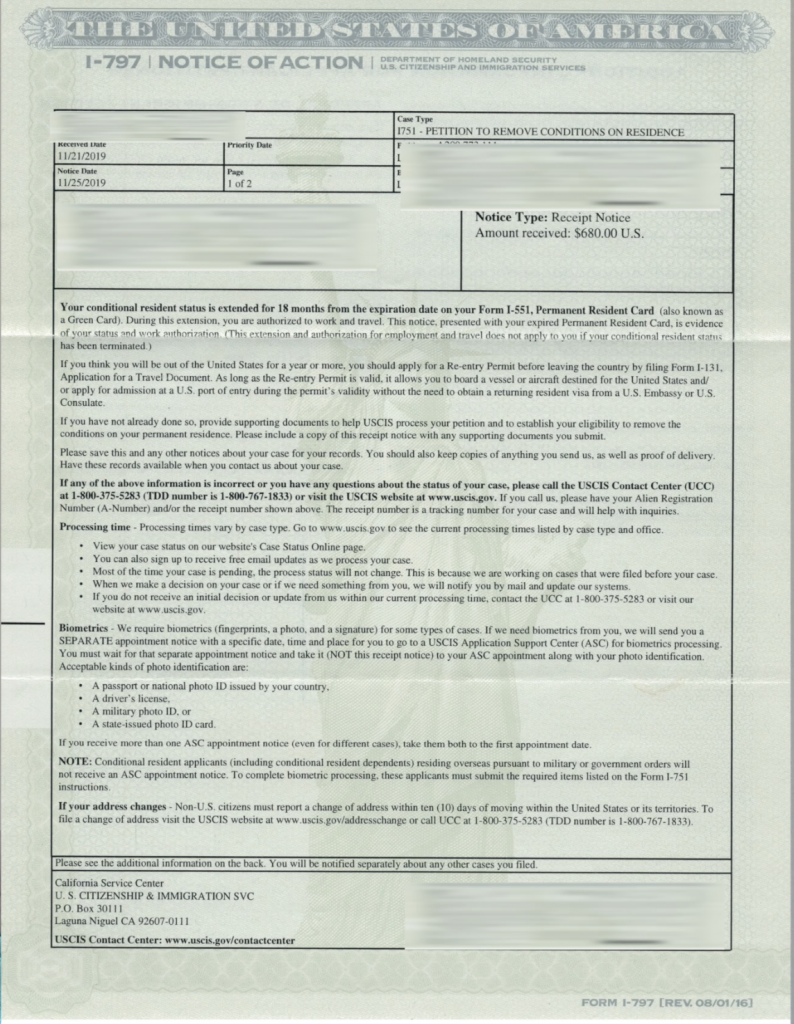
    The notice stated that my conditional resident status is extended for 18 months from the expiration date of my green card.

    And that it is an evidence or proof of my status and work authorization. So I’m still authorized to travel or work.

    Also, it stated there that they might request another Biometrics and if so, we might receive an ASC notice requesting for a biometric scheduled appointment.

    In about a few more months, after the current situation of COVID-19, I might receive another ASC Biometric Notice. At this time, I haven’t received any RFE (Request for Further Evidence) from my application of ROC.

    I just kept on tracking my status on the USCIS website while waiting for the next step.

    In some cases, USCIS doesn’t ask any more for another biometric or interview during ROC approval, applicants could receive a 10-year green card as long as their petition has been approved.

    I hope this post helps you in your application of ROC or Removal of Condition on your Permanent Residency. Please read all of my other posts about the fiance visa application and timeline on my previous posts or go on the links below.

    1. K1 visa application guide
    2. Next Steps After Visa Approval
    3. Report of Marriage
    4. Report of Birth


  • How to Apply I-485 Adjustment of Status with K1 Fiance Visa (with or without K2 derivative)

    How to Apply I-485 Adjustment of Status with K1 Fiance Visa (with or without K2 derivative)

    APPLICATION FOR ADJUSTMENT OF STATUS (AOS)

    After you got married to your petitioner or fiance within the 90 days period, it is a must to apply for adjustment of status and process your papers for your permanent residency. This is the process called “Green Card Application” where after you have submitted all the requirements and supporting documents and gets approved, you will receive your 2-year residency card (green card) or possibly a 10-year residency card if you file after 2 years of marriage.

    You can also apply for Employment Authorization (EAD) to obtain a work permit here in U.S and Advance Parole or Travel document (AP) if you want to travel outside the U.S while still processing with your adjustment of status. You can file all these 3 applications together with single filing fee. But in my case, I only applied for two and those were the AOS and EAD.

    One week after our marriage in the county, March 2017, we received our Marriage Certificate. We started our application for adjustment of status after we completed each and every single requirement of the Form I-485 Adjustment of Status.

    Filling up Form I-485 Application to Register Permanent Residence or Adjust Status

    This has a total of 18 pages where you need to complete all necessary documentation including important details needed in the application form. Make sure that the forms you are filing are the updated ones and don’t forget to sign all your application forms before filing them with the correct filing fee.

    REQUIREMENTS

    (EVIDENCE & SUPPORTING DOCUMENTATION )

    1. 2 pcs. 2×2 recent photographs

    2. Photocopy of Government Issued I.d with your photo typically passport and copy of the visa

    3. Photocopy of Birth Certificate

    4. Inspection & admission evidence such as Form I-94 Arrival-Departure Record or passport page with admission stamp.

    5. Photocopy of Marriage certificate

    6. Form I-944: Declaration of Self Sufficiency

    This is a new form implemented by USCIS for filers after Feb. 24, 2020. It has 18 pages that require initial evidence as well.

    7. Form I-864: Affidavit of Support

    This form has 10 pages with supporting documents such as income tax returns, w-2 or 1099s, form 2555, etc., copy of your sponsor birth certificate, passport, or certificate of naturalization or citizenship.

    REMEMBER: Failure to submit these 2 new forms will result in denial of your I-485 application for adjustment of status.

    8. Copy of Vaccination Record

    This was given to you when you completed your med. exam in St.lukes back in the Philippines.

    9. Copy of your I-797C, Notice of Action/Approval Notice

    10. Index page stating the breakdown of pages of your documents or a COVER LETTER with signature.


    APPLICATION FOR EMPLOYMENT AUTHORIZATION DOCUMENT (EAD)

    Filling up Form I-765 Application for Employment Authorization

    While you apply for your permanent residency, it’s also essential to file for Employment Authorization.

    This will allow you to have a working permit in the United States even though you’re still considered an alien or an immigrant.

    This application has the same required documentation as the I-485 Form so you don’t need to provide another copy of requirements, just that you have to complete its separate forms and it’s about 7 pages.

    But if you’ll be filing only EAD separately you have to pay $410 as filing fee and provide supporting documents or initial evidence such as:

    • Evidence of your admission (for example, a copy of your Form I-94, passport, or other travel documents)
    • Copy of your K visa

    APPLICATION FOR TRAVEL DOCUMENT/ADVANCE PAROLE (AP)

    Filling up FORM I-131 Application for Travel Document

    If you’re planning to travel out of U.S while you are processing your adjustment of status, you can also file for I-131, Application for Travel Document (5 pages) as your re-entry permit.

    But this I do not recommend, it’s better to travel once you already have your green card.

    Most K1 visa holders include this application in emergency purposes just in case there will be an emergency to travel out of the United States you are sure to come back easily if you have your re-entry permit.


    FILING I-485 AOS, I-765 EAD & I-131 AP

    FILING FEE: $1,140

    BIOMETRICS SERVICE FEE: $85

    • I-485, I-765, I-131 Filing Fee (2020) : $1,140 + biometric services fee of $85= Total of $1,225 made in single check
    • KIDS 13 yrs. and under filing with a parent in form I-485: $750
    • Kids filing separately: $1,140 (no biometric service fee)


    WHERE TO FILE: USCIS Chicago Lockbox

    For U.S. Postal Service (USPS):

    USCIS
    PO Box 805887
    Chicago, IL 60680-4120

    For FedEx, UPS, and DHL deliveries:

    USCIS
    Attn: FBAS
    131 South Dearborn – 3rd Floor
    Chicago, IL 60603-5517

    Or you can call the National Customer Service Center FOR MORE CURRENT INFORMATION.

    I hope this guides you throughout all the necessary documentation you need in filing your Adjustment of Status here in U.S. Now, I will share with you my timeline during our application to give an idea about the process and the letters or notice that you will receive from USCIS after you send all of these applications.

    Before that, I want to illiterate that I only filed for AOS and EAD without AP so unlike most of the K1 visa filers I didn’t receive a combo card. If you filed all these 3 applications together then that’s when you receive a combo card but not in my case I received each document separately in different periods of time.

    MY K-1 AOS TIMELINE

    I-485 & I-765 Notice from USCIS
    I-485 & I-765 Notice from USCIS

    APRIL 13,2017: Receipt of I-485 & I-765 Notice from USCIS

    • The letter states the next step which is to wait for Biometric Appointment Schedule Notice.


    MAY 5,2017: Receipt of ASC Appointment Notice

    • Stating Place of the Biometric Center
    • Date and Time of Appointment
    • Things to Bring on the Day of Appointment:
    1. ASC Appointment Notice
    2. Photo I.D such as passport, state-issued I.d, driver’s license, etc.


    MAY 23,2017: Biometric Appointment Day

    Approval Notice for I-765 Employment Authorization
    Approval Notice for I-765 Employment Authorization
    • More or less 10-20 minutes
    • After you’re done with biometrics, the officer will put a Biometric Processing Stamp on your ASC Appointment Notice


    JULY 29,2017:Receipt of Approval Notice for I-765 Employment Authorization

    • The letter states that USCIS will send my EAD card (Employment Authorization Document) in a separate mail.


    AUGUST 2017: Receipt of EAD Card

        • Finally got my EAD card.
        • Reminder: Check all your information in the card, if there’s some mistake request to USCIS to change what needs to be corrected as soon as possible to avoid future problems.
        • Your EAD card has only 1-year expiry.
        • So you have to have your green card already after your EAD expires.
    EAD Card
    EAD Card

    AUGUST 10,2017: Application for SSN Valid for Work Only

    If you’re already working here in the U.S, it is a must that you have your social security number. You should apply for your social security valid for work besides your EAD card.


    AUGUST 21,2017: Receipt of SSN Card


    DECEMBER 19,2017: Receipt of Request for I-485 AOS Initial Interview Notice

    I-485 AOS Initial Interview Notice
    I-485 AOS Initial Interview Notice
    • A letter stating the Schedule of Interview with complete information such as Date, Time & Location
    • Things to Bring on Interview as per notice:
    1. Both you and your petitioner which is already your (husband/wife) should be present during the interview
    2. This Interview Notice
    3. Government-issued photo I.d
    4. Documentation establishing eligibility for permanent resident status
    5. Employment Authorization (EAD) Card or Advance Parole (if any)
    6. Travel documents such as passport, I-94 (Arrival/Departure Document) and or you Advance Parol document (if any)
    7. Birth Certificates
    8. Husband’s/Petitioner’s Birth Certificate
    9. Husband’s/Petitioner’s Proof of Citizenship
    10. If you have kids, bring their birth certificates too
    11. Copy of Marriage Certificate
    12. Divorce decrees/death certificates prior to marriage/former spouse (if applicable)
    13. Relationship supporting documents such as joint bank statements, insurance documents, and other joint liabilities.


    JANUARY 23,2018: Initial Interview Day

    REMINDER: Arrive earlier than your scheduled time. Since before you get in at the main office there will be a security check and if there are a lot of people it will consume a lot of time.

    Once your there, here are the steps you might experience during your’s too.

    • Show interview notice
    • Check-in and register then wait for your turn to be called.
    • Once called, both you and your spouse will go in a private office with the interviewer.

    INTERVIEW QUESTIONS:

    1. Asked for passports
    2. How’s your married life?
    3. How did you meet each other?
    4. When and where did you get married?
    5. How many kids do you have?
    6. Asked for birth certificate of each petitioner & you
    7. Asked for the birth certificate of baby
    8. Are you both employed?

    Be prepared for every document that you have, make sure to take it with you just in case your interviewer will ask for it.

    Right after the interview the officer or the interviewer will hand down to you a letter which is the NOTICE OF INTERVIEW RESULTS which states that my case is being held for review and that my I-485 is complete and approvable.

    My case will be transferred to TSC (Texas Service Center).

    And also to allow no less than 120 days before making a status inquiry.


    END OF JANUARY 2018: Receipt of Approval Notice for Permanent Resident Card

    • The notice states that the application or petition has been approved and might be asked for biometrics again within 90 days. But fortunately, I didn’t have to re-do my biometrics before.


    END OF JANUARY 2018: Receipt of Green Card/Permanent Resident Card

    • Finally, I got my green card on-hand. Make sure to check all your information on the card and if there’s any error call USCIS immediately so they correct it as soon and issue you a new card with corrected information.
    • This green card has 2 years expiry so I was advised to file removal of condition of my green card 90 days before my green card expires.
    Green Card/Permanent Resident Card
    Green Card/Permanent Resident Card

    These are the steps I’ve gone through when I applied for mine. Just a disclaimer, I’m not a lawyer nor a professional immigration officer, every information I share here are all based on my experience and search on the official website of USCIS.

    Each case is different so you really have to do your self-research about your case, I would recommend going through the website of USCIS. If you’re a k1 applicant then I hope I give you some information that you need for your Adjustment of Status.

    Please do read my other blogs about my K-1 visa journey here:


  • What’s NEXT after K1 VISA Approval? CFO | ARRIVAL AT POINT OF ENTRY | CBP INTERVIEW

    What’s NEXT after K1 VISA Approval? CFO | ARRIVAL AT POINT OF ENTRY | CBP INTERVIEW

    The application for K1 fiance visa is just the beginning of your journey going to the United States. I know it’s been quite a long process but I would like to CONGRATULATE you now for getting through all the hustle of filling up the initial forms and passing the interview! So now that you finally received your K-1 visa, what’s next?

    Here are the next steps you should start doing after you received your passport stamped with the visa from U.S Embassy.

    CFO SEMINAR (LAST STEP after Release of Visa)

    It’s a guidance and counseling program or pre-departure orientation required by our government in the Philippines for fiances, spouses and other partners of foreign nationals or of former Filipino citizens. Given and promoted by Commission on Filipino Overseas to protect the welfare and safety of Filipino immigrants. This program can be taken in different locations around the Philippines, Manila, Cebu, Pampanga, and Davao.

    CFO – MANILA (+632) 552-4700 : Citigold Center, 1345 Pres. Quirino Ave. corner Osmena Highway (South Superhighway)Manila, Philippines 1007
    Email: info@cfo.gov.ph

    CFO – CEBU (032) 255-5253 : 4th Floor, K&J Building #4 Don Julio Llorente St., Capitol Site, Cebu City 6000
    Email: cfocebu@cfo.gov.ph

    CFO – CLARK EXTENSION DESK (045) 499-8119 : One-Stop Processing Center in Clark (OSPC) Clark Polytechnic Compound, Jose Abad Santos Ave., Clark Freeport Zone
    Email: info@cfo.gov.ph

    CFO – DAVAO SATELLITE OFFICE (+6382) 228-2432 : 5th floor, AMQ Building, Lakandula St. Corner, Dacudao Ave., Agdao, Davao City
    Email: info@cfo.gov.ph

    Before going to their office, be sure to make an appointment online or you can contact the office first if you have any other inquiries and complete all the required documents. Also, prior to scheduling an appointment for CFO Seminar you have to have your passport already with the stamped visa in it.

    REQUIREMENTS:

    If you haven’t received your visa yet, CFO still allows you to take the counseling just comply on the following requirements:

    1. Two valid I.D with a photograph
    2. Completed guidance and counseling form from CFO
    3. Valid passport
    4. Valid visa
    5. Completed emigrant registration form
    6. Please provide the following if it’s applicable to you. (If you or your fiance have a previous marriage before)
    • Divorce decree/certificate
    • Annulment paper

      CFO sticker
      CFO sticker k1 passport
    • Proof of residency/Alien Registration Card-ARC (for foreign fiance)
    • Proof of relationship (pictures together, chats, emails, etc.
    • Death certificate (widow/widower

    REMEMBER:  You should bring the printed barcoded confirmation form with you during your scheduled appointment or you can present the digital copy (either on your phone,pc or tablet) as long as your name and the reference number are there.

    Even though you made an appointment online, it doesn’t mean that you will be in the priority list so arrive early than your appointment time since registration takes time.

    The counseling is done in groups in a small room with one speaker/counselor. It takes about an hour and the release of the certificate is given on the same day after your counseling session.

    Your passport will also be released with CFO sticker together with the CFO certificate.


    On my experience, I thought I would need the CFO certificate at the airport during our flight and upon arrival at the port of entry but officers didn’t even ask for it. What’s more important is the CFO sticker that was on your passport.

    Even though the certificate is not that of importance I would still recommend keeping it on your important documents so that whenever or whoever will ask for it you are always prepared.

    CFO Certificate
    CFO Certificate

    BEFORE FLIGHT REMINDERS

    1. Check all important documents especially the yellow packet/sealed envelope. Organize it in a clear book and bring it into your hand carry, NEVER put it on your luggage or suitcases.
    2. Be aware of your luggage weight just so you won’t be charged for any extra fees at the airport. REMEMBER, do not bring prohibited items such as food, liquid especially illegal items.

    ARRIVAL TO POINT OF ENTRY

    In California, the first process we went through is immigration then CBP or Custom Border Protection Inspection and Interview then to baggage claim.

    Lines were separated among U.S passport holders and foreign passport holders so I was by myself when we through Immigration and Customs.

    This is why it is very important to have your important documents in your hand-carry luggage so that whenever and wherever you go you have with you all the time.

    IMMIGRATION

    First and foremost is, of course, passport verification.

    There will be biometrics and photo capture when you pass through immigration.

    If not all, most passengers pass by immigration so expect to spend some time here.

    Then you’ll be asked to proceed to Customs and Border Protection.

    CUSTOM AND BORDER PROTECTION (CBP)

    Here you will meet the CBP Officer who will first ask for your passport again for verification.

    Then together with your passport, hand over the Sealed Yellow Packet. Only the CBP Officer has the authority to tear the yellow packet and get the forms out of it.

    After all the checking and verification of documents, the officer will start the interview.

    Here are some of the questions I’ve experienced during my CBP interview.

    INTERVIEW QUESTIONS:

    1. When is the wedding?
    2. Share a short story about how you met your fiancé.
    3. Do you know your fiancé well? Is he a good man?
    4. Have you talked to your fiancé’s family?
    5. Did your family approve or accepted him?
    6. Which city will you live here in California?
    7. The officer also reminded me to get married within 90 days.


    REMINDERS TO ALL K1 VISA HOLDERS: You have to get married within 90 days to your U.S petitioner upon admission since this timeframe cannot be extended.

    After the interview, the CBP Officer started to scan my passport and other documents. She then returned my passport and kept the other documents.

    Until then you could proceed to baggage claim.

    BAGGAGE CLAIM

    After going through all those procedures, finally going to the release and picking-up of your luggage and suitcases.

    Some people go through further inspection of luggage before going out of the airport, officers ask to open your bags and investigate to each of the things you have inside.

    Luckily in our case we didn’t go through further luggage inspection and just found ourselves straight to the gate going out of the airport.


    These are the steps that you have to go through upon approval of your K-1 fiance visa. This is not the end of your visa journey yet since this is only the beginning of your AMERICA life and that there will be another process after you got married to your fiance and that would be the adjustment of status.

    It will be a long journey but I assure you it will all be worth it once you’re done with everything.

    I hope this gives you an idea of what to expect once you arrive in U.S.

    Just a disclaimer, I’m not an expert, neither a lawyer. All information I shared with you here are all based on my experience.

    I wish you a happy marriage and fruitful life ahead of your family!